Worm farming mastery is within your reach, and it all starts with a simple choice: to turn your kitchen scraps into gardening gold. Forget the old image of a smelly, complicated chore. Modern worm farming, or vermicomposting, is a clean, efficient, and incredibly rewarding way to boost your garden’s health while shrinking your bin. For us Aussies, it’s a no-brainer. It tackles our food waste problem, builds resilience in our often-tough soils, and creates the richest natural fertiliser you can find. Whether you’re on a suburban block, a flat with a balcony, or a rural property, this guide will give you the know-how to become a true worm-whisperer.
Table of Contents
Why Your Backyard Needs a Worm Farm
Let’s talk impact. In Australia, a staggering amount of what we throw away is organic waste that could be composted . When this waste breaks down in landfill without oxygen, it creates methane, a potent greenhouse gas, and can pollute groundwater . A worm farm is a powerful, personal solution. It’s an aerobic process that turns waste into a resource, not a pollutant .
Beyond the environmental win, the benefits for your garden are extraordinary. Worms are living fertiliser factories. They produce:
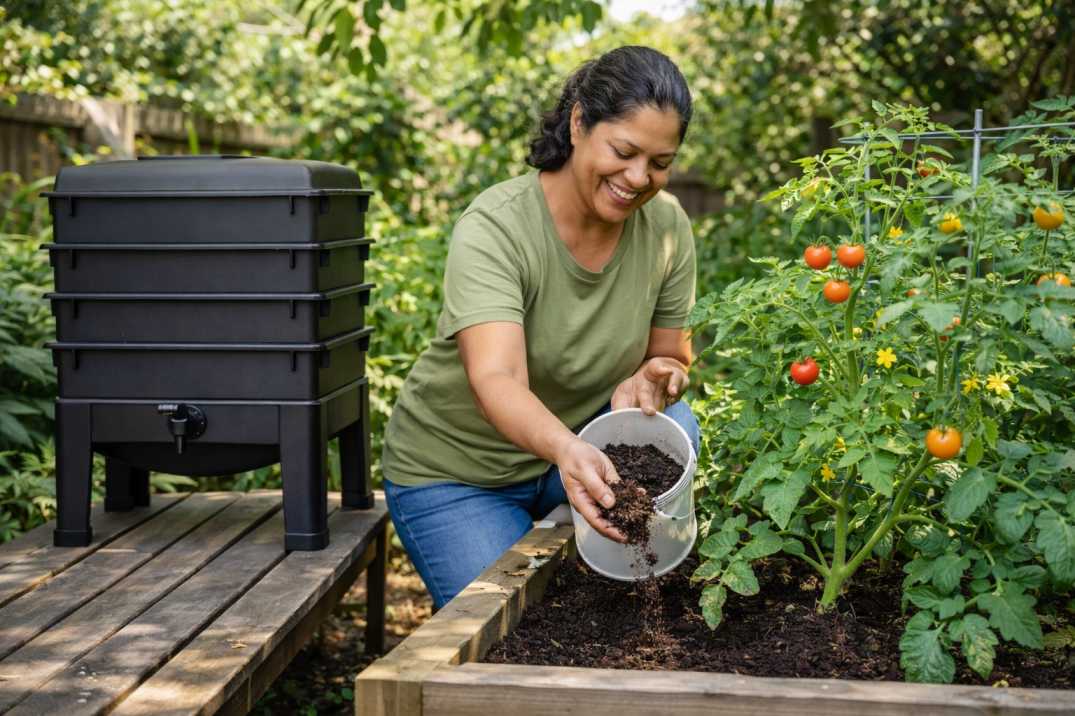
- Worm Castings (Vermicast): This dark, crumbly, soil-like material is the star of the show. It’s packed with nutrients, beneficial microbes, and humic substances that improve soil structure and plant health .
- Worm Tea: A liquid fertiliser you can brew from the castings, teeming with life and perfect for giving plants a quick boost .
It’s a fascinating, family-friendly project that completes the cycle in your own sustainable backyard . If you’re growing veggies in a DIY raised garden bed, worm castings are the perfect soil conditioner to add each season.
Part 1: Getting Started – Your Worm Farm Foundation
Success begins with the right setup. Don’t worry; it’s straightforward and you can even start small.
Choosing Your System: From Bins to Towers
You have three main options, each with pros and cons.
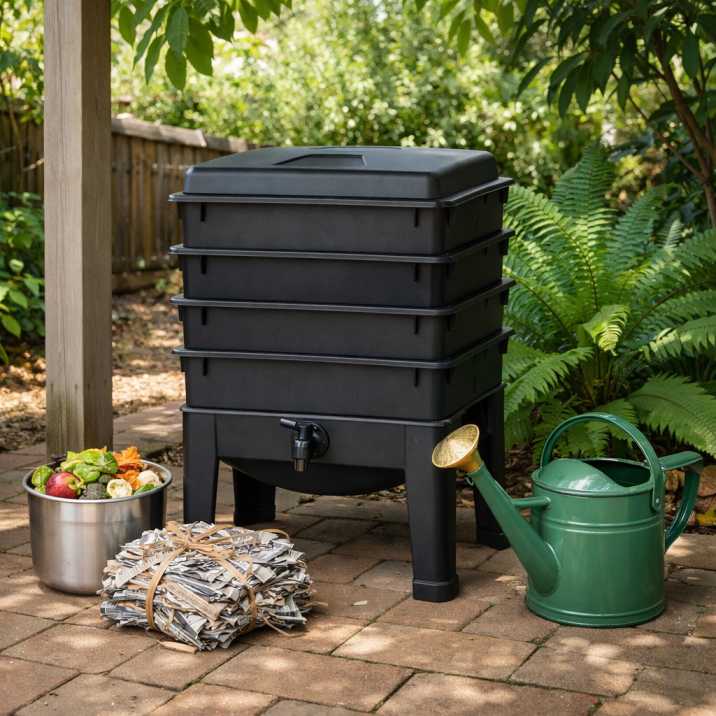
- Stacked Tray Systems (Ideal for Beginners): These are the neat, “off-the-shelf” worm farms you’ll see at garden centres. Worms start in the bottom tray with bedding and food. Once it’s full of castings, you add a new tray with fresh food on top. The worms migrate upwards, leaving you with a tray of ready-to-harvest castings below . They’re tidy, efficient, and great for patios or balconies.
- Single-Bin/DIY Bins: A simple, single container (like a recycled polystyrene box or a plastic tub with holes) is a low-cost way to start . It requires a different harvest method (like moving castings to one side), but it’s wonderfully simple. An old bathtub can even make a great large-scale farm .
- In-Ground or “Worm Tube” Systems: This is a fantastic set-and-forget option for garden beds. It’s essentially a pipe with holes buried in your soil. You add scraps to the tube, and worms come and go, enriching the soil directly around it . It’s less about harvesting castings and more about locally supercharging your soil, perfect for pairing with a dedicated vegetable garden australia.
The Right Worms for the Job
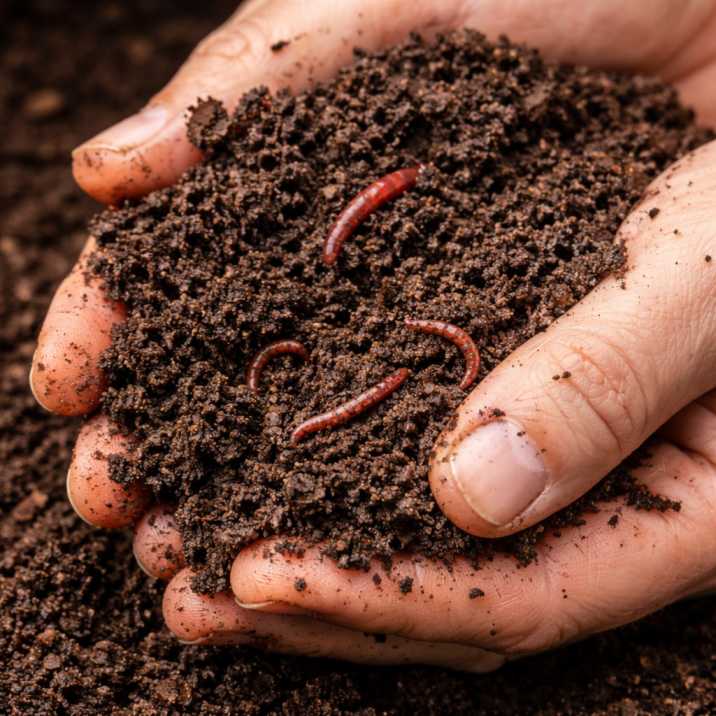
You can’t just dig up garden earthworms. You need composting worms, which are surface dwellers that thrive in dense, organic-rich environments . In Australia, the two main types are:
- Eisenia fetida (Red Wigglers or Tiger Worms): The most common and hardy. They are prolific breeders and excellent eaters.
- Eisenia andrei (Redworms): Very similar to Red Wigglers and often sold alongside them.
You can buy them online, from garden centres, or maybe even get a starter batch from a fellow composting friend . Start with at least 1,000 worms to get a system processing waste effectively.
The Perfect Location: Keeping Cool is Key
Worms are temperature-sensitive and prefer a range of 15°C to 25°C . In the scorching Aussie summer, a worm farm in full sun will cook. In winter, they slow down.
- Ideal Spot: A shady, sheltered location is non-negotiable. Under a deciduous tree, on a cool south-facing balcony, in a carport, or even a garage or laundry (if well-ventilated) are perfect .
- Extreme Weather Tactics: On days over 30°C, they’ll try to escape; below 10°C, they start to die . Use a moistened hessian bag, carpet underfelt, or old blanket as a “worm blanket” on top of the bedding to insulate them . In a heatwave, a frozen water bottle placed on the bedding can help cool them down, better than ice cubes, which can waterlog the system .
Part 2: The A.D.A.M. Principle – Your Guide to a Thriving Farm
Think of your worm farm as a living ecosystem. The A.D.A.M. principle is an easy-to-remember framework for keeping it healthy .
A is for Aliveness
Your farm is a living creature. It’s not just worms; it’s a whole community of beneficial bacteria and fungi that do the initial breakdown of food. Your job is to steward this community .
D is for Diversity
Just like us, worms need a varied diet for optimal health. The greater the variety of organic material, the better the castings will be .
- Greens (Nitrogen-Rich): Fruit & veggie scraps, coffee grounds, tea leaves, fresh garden clippings.
- Browns (Carbon-Rich): Shredded newspaper, cardboard, egg cartons, dry leaves, straw. This is crucial bedding! .
- Other Goodies: Crushed eggshells (help balance pH), vacuum dust, hair .
- Avoid: Citrus, onions, garlic, meat, dairy, oils, and cooked foods in large quantities . These can make the farm too acidic or attract pests.
A is for Aeration
Worms and their microbial friends need oxygen. A soggy, compacted farm becomes anaerobic (without air), leading to bad smells and toxic conditions .
- How to Aerate: Fluff up the bedding regularly with a hand fork. Ensure your bin has adequate ventilation holes. Adding crumpled cardboard or ripped-up egg cartons creates air pockets.
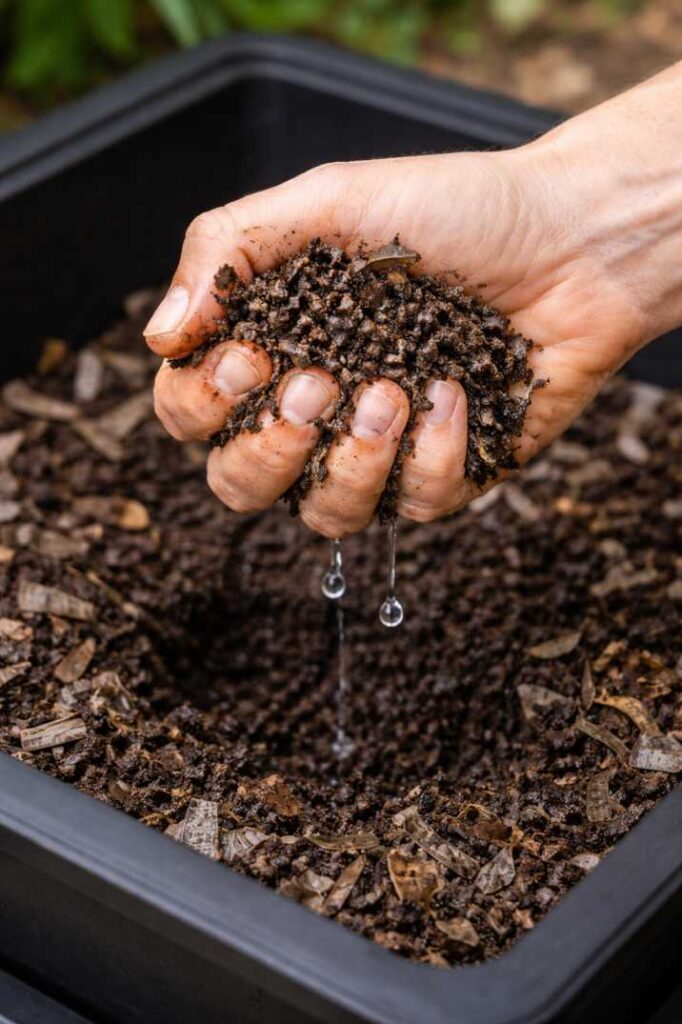
M is for Moisture
Worms breathe through their skin and need a moist environment. The bedding should feel like a wrung-out sponge, damp but not dripping . If you squeeze a handful, only a drop or two of water should come out.
Part 3: Feeding & Maintenance – The Daily Rhythm
How Much and How Often to Feed
This is where most beginners go wrong. The biggest mistake is overfeeding .
- Start Slow: A new farm with 1,000 worms might only handle one metric cup of scraps per week . They need time to breed and settle.
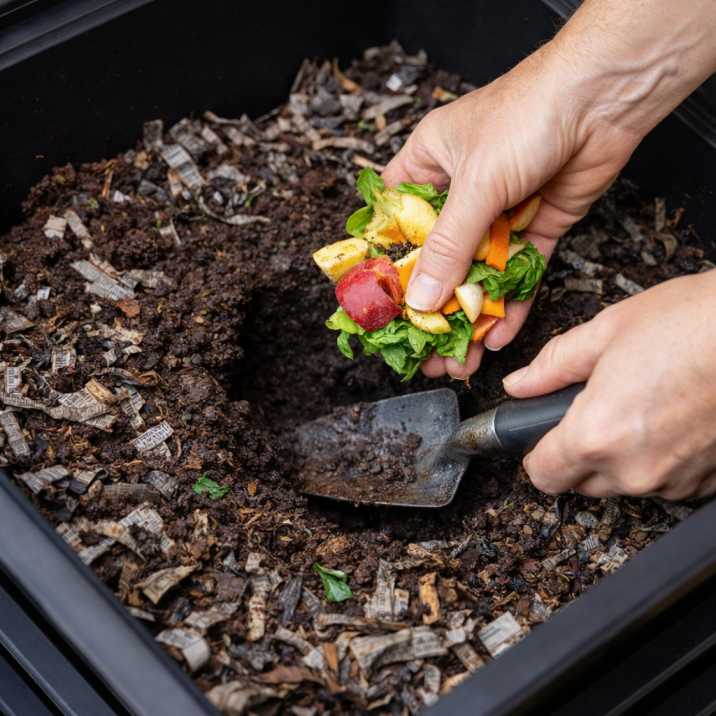
- The Pocket Feeding Method: An expert-recommended technique. Bury small amounts of food in a different “pocket” or corner of the farm each week. This prevents uneaten food from building up and going sour .
- Check Before You Feed: Only add more food when the previous batch is mostly gone. When in doubt, add more carbon (shredded paper) instead of food .
The Harvest: Collecting Your Black Gold
After 3-6 months, you’ll have beautiful, dark castings to harvest.
- For Tray Systems: Once the bottom tray is full and looks like moist, crumbly soil, stop adding food to it. Place the new tray with fresh food and bedding on top. The worms will migrate up, leaving the lower tray ready to harvest .
- For Single Bins: Push all contents to one side. Add fresh bedding and food to the empty side. Over the next few weeks, worms will move over, allowing you to scoop out the finished castings.
Using Your Harvest: Castings and “Tea”
- Worm Castings: This is premium stuff. Use it as a top dressing for garden beds and pots, mix it into potting soil (10-20% by volume is great), or add it to planting holes . It’s gentle and won’t burn plants.
- Worm Tea vs. Leachate: This is important.
- Leachate is the liquid that drains from the bottom of some farms. It’s a byproduct of decomposition and can contain pathogens if the farm is too wet or acidic. Use it with caution, heavily diluted (10:1), only on ornamental plants, and never on leaves .
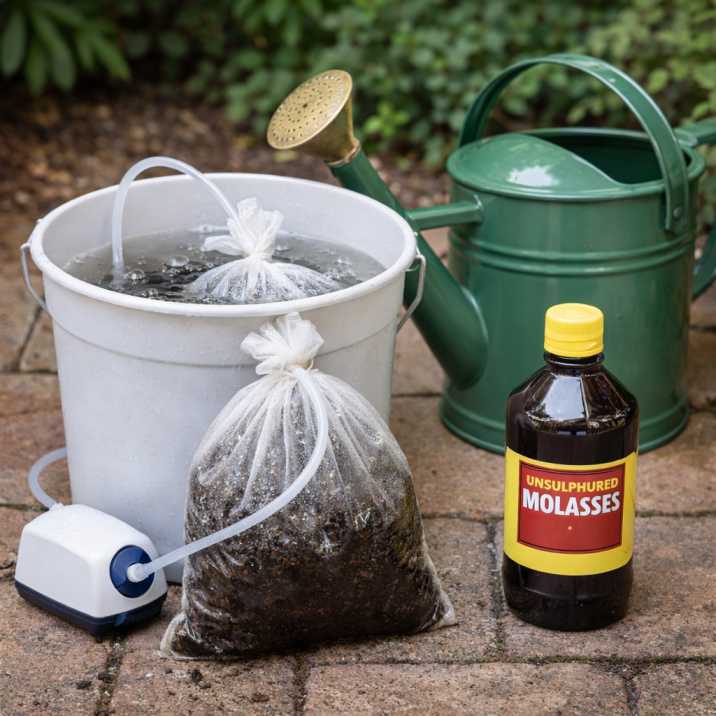
- Proper Worm Tea is an aerated brew made by suspending castings in oxygenated water with a food source (like molasses) for 24 hours. This brew is teeming with beneficial microbes and is safe and excellent for all plants as a soil drench or foliar spray . A simple small-batch worm tea brewer can be a great next project.
Part 4: Troubleshooting – Solving Common Worm Farm Problems
Even the best worm farmers hit snags. Here’s a quick guide to diagnosing and fixing common issues.
If things get really out of balance, sometimes the best fix is to start a fresh tray or bin with new bedding and move the healthy worms over, leaving the problematic material behind.
Part 5: Advanced Worm Farming Mastery
Once you’ve got the basics down, you can explore techniques to maximise output and integrate your farm into a complete sustainable system.
Brewing High-Quality Aerated Worm Tea
For a potent microbial boost, go beyond the leachate. You’ll need a bucket, an aquarium air pump and stone, unsulphured molasses, and quality castings. Bubble the mixture for 24-36 hours. The tea should be used within a few hours of brewing for maximum benefit, sprayed directly on soil and plant leaves .
Integrating with Other Systems
Your worm farm shouldn’t be an island. It’s the heart of a closed-loop backyard ecosystem.
- Feed your farm scraps from your vegetable garden australia.
- Use the castings to supercharge your DIY raised garden bed soil.
- Divert tougher yard waste and larger volumes to a diy compost bin australia, using the finished compost as occasional bedding for the worms.
- Pair worm tea with other organic feeds like liquid kelp for a complete plant nutrition program .
Optimising for Australian Climates
- Arid & Hot Zones: Moisture retention is key. Use coconut coir as bedding—it holds water well. Shade and insulation are non-negotiable. Consider an in-ground worm tube where the earth’s mass provides natural temperature buffering .
- Cool & Temperate Zones: In winter, move the farm to the warmest sheltered spot you have (like a garage). Wrap it in bubble wrap or old blankets. You can reduce feeding as their metabolism drops.
- Tropical & Subtropical Zones: Excellent worm climate, but watch for heavy rain waterlogging the farm. Ensure perfect drainage and have a cover to prevent monsoonal rains from flooding it. High humidity does the watering for you, so be careful not to add excess moisture.
Frequently Asked Questions
Q: Can I use worm castings on native Australian plants?
A: Yes, but sparingly. Many natives are adapted to low-phosphorus soils. Castings are generally balanced, but use them as a light top-dress rather than mixing in large volumes. A 5% mix by volume in the planting hole is a safe bet .
Q: How do I know if my worm castings are good quality?
A: Look, feel, and smell. They should be dark brown/black, crumbly (like coffee grounds), and have a pleasant, earthy soil smell never sour or rotten . They should be slightly moist, not dusty dry or soaking wet.
Q: My farm has tiny white worms. Are they bad?
A: Those are most likely pot worms (enchytraeids), which are harmless decomposers. They often appear in very moist, acidic conditions. They’re not a problem, but their presence is a sign to add more dry carbon (cardboard, paper) and maybe a sprinkle of lime to reduce acidity.
Q: Can I go on holiday and leave my worms?
A: Absolutely! A week or two before you go, give them a larger-than-normal feeding buried well in the bedding. Then, cover the entire surface with a thick layer of moistened shredded newspaper, cardboard, or straw. This will hold moisture and serve as an emergency food source. They’ll be fine for 3-4 weeks .
Conclusion: Your Journey to Worm Farming Mastery
Starting your worm farm is a simple act with profound rewards. You’re not just managing waste; you’re actively creating the most powerful natural fertiliser known to gardening, building healthier soil, and contributing to a more sustainable cycle right in your own home.
Worm farming mastery isn’t about never making a mistake, it’s about observing, learning, and gently steering your wriggling workforce. Begin with the basics: a simple bin, the right worms, a shady spot, and the patience to feed them slowly. Follow the A.D.A.M. principle, and you’ll avoid most pitfalls.
Remember, every scrap you feed them is a scrap that doesn’t go to landfill, and every handful of castings you harvest is a handful of life for your garden. It’s a satisfying, living link between your kitchen and your garden, a perfect example of the eco friendly backyard projects we can all embrace. So, take the plunge. Your plants, and the planet, will thank you for it.