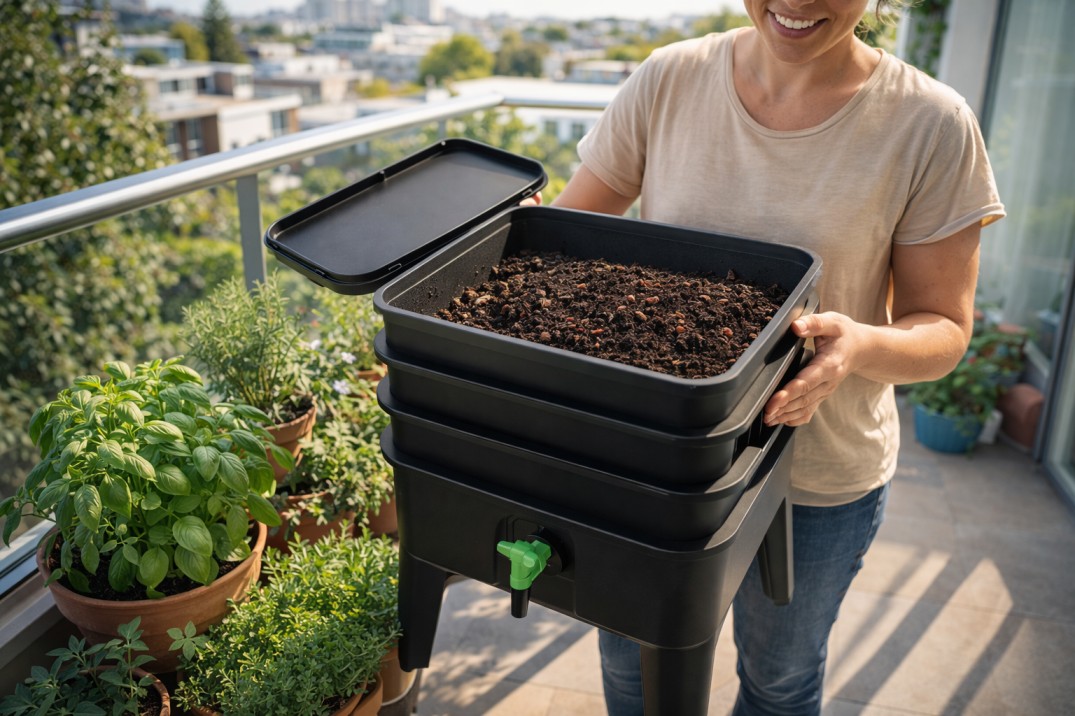
Let me guess. You’re standing on your balcony, looking at a sad pot plant. Or you’re in your backyard, guiltily scraping veggie scraps into the bin. You’ve heard about worm farms. It sounds smart, turning waste into plant food. But then your mind races: Where do I put it? Will it smell? Do I have to touch the worms? What if they all die?
I was you. I put it off for years, convinced it was a messy, complicated science project. Then, one weekend, I took the plunge. And you know what? I discovered that starting a worm farm for beginners Australia is one of the easiest, most satisfying things you can do. It’s quieter than a compost tumbler, faster than a backyard pile, and honestly, it feels a bit like magic.
This guide is for the absolute beginner. We will walk through seven simple, foolproof steps. We’ll answer every “what if” that’s holding you back. By the end, you’ll have a clear, confident plan to welcome thousands of wriggly new friends to your home. They’ll eat your garbage and give you the most powerful natural fertiliser your plants have ever seen.
Table of Contents
Why a Worm Farm is the #1 Hack for Aussie Beginners
So, why choose a worm farm over a regular compost bin? If you’re new to recycling your waste at home, this is the perfect starting point. Let’s break down why a worm farm for beginners Australia is such a brilliant idea.
First, it solves the space problem. Live in an apartment, townhouse, or have a tiny courtyard? No problem. A compact worm farm fits neatly on a balcony, under a patio, or even in a laundry (if it’s well-ventilated). It’s the secret weapon for small-space sustainability. It’s a core part of building a Sustainable Aussie Backyard, no matter your square footage.
Second, it’s clean and efficient. A well-managed worm farm doesn’t smell. Seriously. It should have a pleasant, earthy aroma. The worms work 24/7 to break down your scraps, and because the system is enclosed, you won’t have issues with rats or larger pests. It’s a tidy, self-contained ecosystem.
Finally, the output is pure gold. With a traditional compost pile, you get one product: compost. With a worm farm, you get two:
- Worm Castings (Vermicast): This is the solid compost. It’s a rich, odourless, crumbly material that’s packed with nutrients and beneficial microbes. It’s the ultimate soil conditioner.
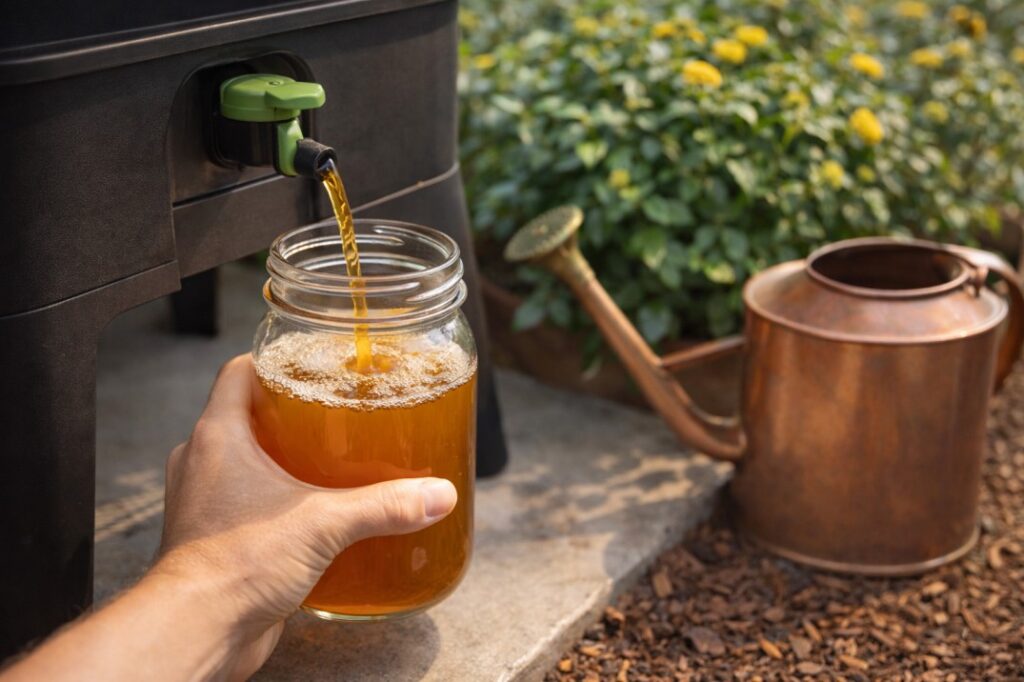
- Worm “Tea” (Leachate): This is the liquid that drains from the bottom tap. When diluted, it becomes a potent liquid fertiliser that acts like an energy drink for your plants, boosting growth and resilience.
If you’re exploring other ways to enrich your garden, this “black gold” pairs perfectly with nutrients from a general composting at home Australia system for larger gardens.
Your 7-Step Blueprint to Worm Farm Success
Forget complicated instructions. Here is your straightforward, step-by-step blueprint. Follow these, and you’ll be a worm-whisperer in no time.
Step 1: The Smart Start – Choosing Your Worm Farm Kit
Don’t try to build your own from scratch as a beginner. A purpose-built kit is designed for success and makes every step easier.
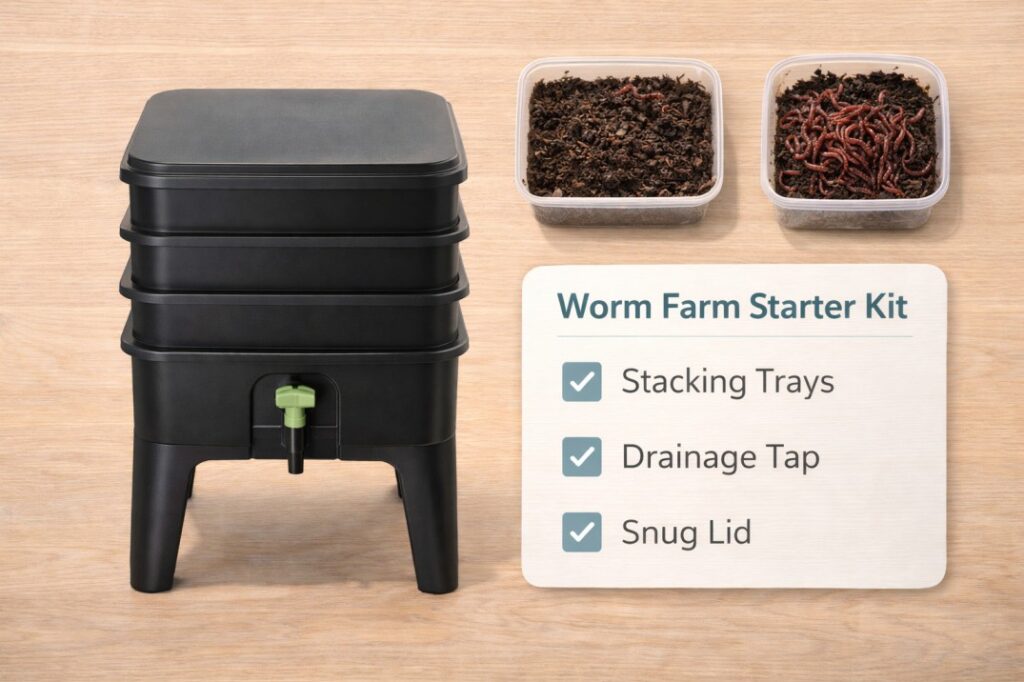
What to Look For in a Starter Kit:
- Tray System: Look for a stackable tray system (like the popular “Can O’ Worms” or “Worm Cafe”). You start in one tray; when it’s full, you add another on top. The worms migrate upwards, leaving finished compost below. Harvesting is a breeze.
- A Good Lid & Tap: A snug-fitting lid keeps light, pests, and excess rain out. A tap at the base is essential for easily draining the liquid fertiliser.
- Legs or Stand: This elevates the farm, makes the tap accessible, and allows for air circulation.
Where to Buy:
You can find excellent starter kits at Bunnings, local garden centres, or from reputable Australian online retailers like Tumbleweed. Many local councils also offer discounted kits to residents, always check their website first!
Step 2: Finding the Perfect “Worm Real Estate” Location
Location is everything for worm happiness. Think of them as tiny, wriggly tenants who hate extreme weather.
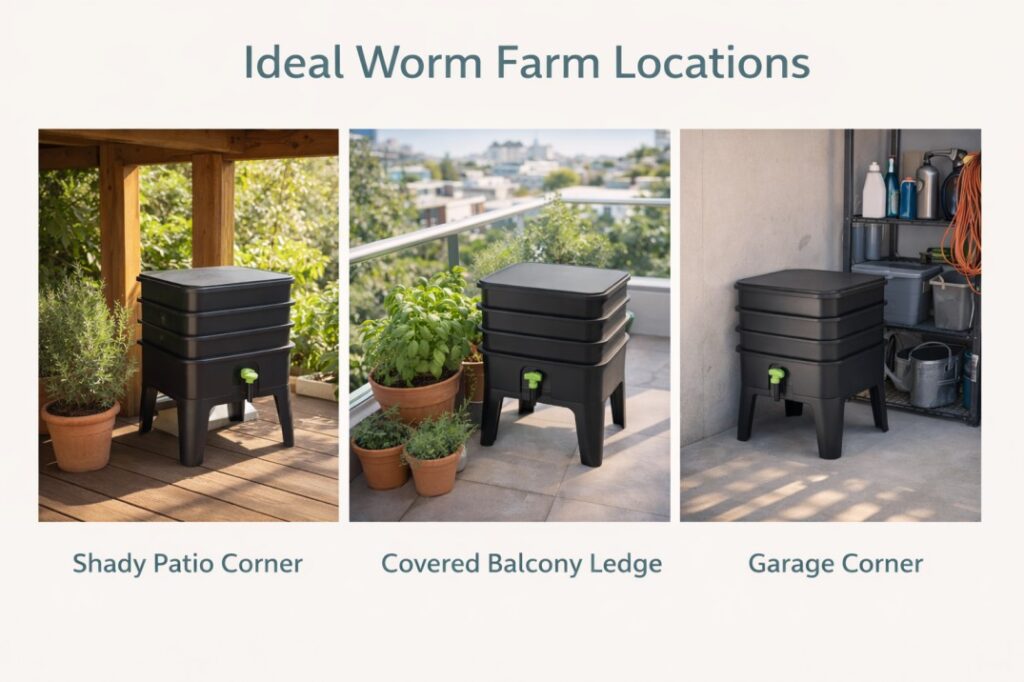
The Goldilocks Zone:
- Shelter is Key: Under a shady patio, in a carport, a sheltered garden corner, or a ventilated garage or laundry.
- Temperature Matters: Worms thrive between 15°C and 25°C. Protect them from direct, all-day summer sun (they will cook) and from heavy frosts in winter. A spot with morning sun and afternoon shade is ideal.
- Convenience Wins: Place it somewhere you’ll remember to feed them! Near the kitchen door or on a balcony you use daily is perfect.
Step 3: Welcoming Your Wriggly Workforce
You can’t use garden earthworms. You need composting specialists: Tiger Worms (Eisenia fetida) or Red Wigglers.
- How Many? For a worm farm for beginners Australia, start with about 1,000 worms (roughly 250g). They reproduce quickly and will grow their population to match your food supply.
- Where to Buy: They often come with the kit, or you can buy them from the same suppliers. They’ll arrive in a bag of moist bedding.
Step 4: Setting Up the Perfect Worm Bed & Breakfast
This one-time setup gets your farm off to a perfect start.
- Prepare the Bedding: Your kit will likely include a coir (coconut fibre) brick. Soak it in a bucket of water until it expands. Then, squeeze it out thoroughly, it should be as damp as a wrung-out sponge, not dripping. Fluff it up and place it in the bottom tray. This is the worms’ initial home and “brown” carbon source.
- Add the Worms: Gently empty your worms and their bedding onto the surface of the coir. Leave the lid off under a gentle light for an hour. The worms will burrow down away from the light, settling into their new home.
- The “Bedding Blanket”: Place a sheet of damp newspaper, cardboard, or a piece of hessian (like an old coffee sack) over the bedding. This keeps things dark, moist, and cozy. Now, put the lid on.
Step 5: The Feeding Guide – What to Feed (and What Will Get You in Trouble)
Feeding is simple, but there are rules. A happy worm farm for beginners Australia is a balanced one.
The “Yes, Please!” List (Worm “Greens”):
- Fruit and vegetable scraps (peels, cores, soft bits)
- Coffee grounds and tea bags (remove staples if present)
- Crushed eggshells (helps balance pH and grit for their digestion)
- Small amounts of bread, pasta, and cereal
Pro Feeding Tip: Chop or freeze scraps. Freezing bursts cell walls, and chopping creates more surface area. This helps the worms eat faster and prevents the farm from becoming overloaded and smelly.
The “Absolutely Not” List:
- Citrus, Onions, Garlic: In large quantities, these are too acidic and can harm your worm population.
- Meat, Fish, Bones, Dairy: These will rot and create foul odours and pests long before worms can process them.
- Oily Foods, Salty Foods, Pet Waste: These can poison your worm ecosystem.
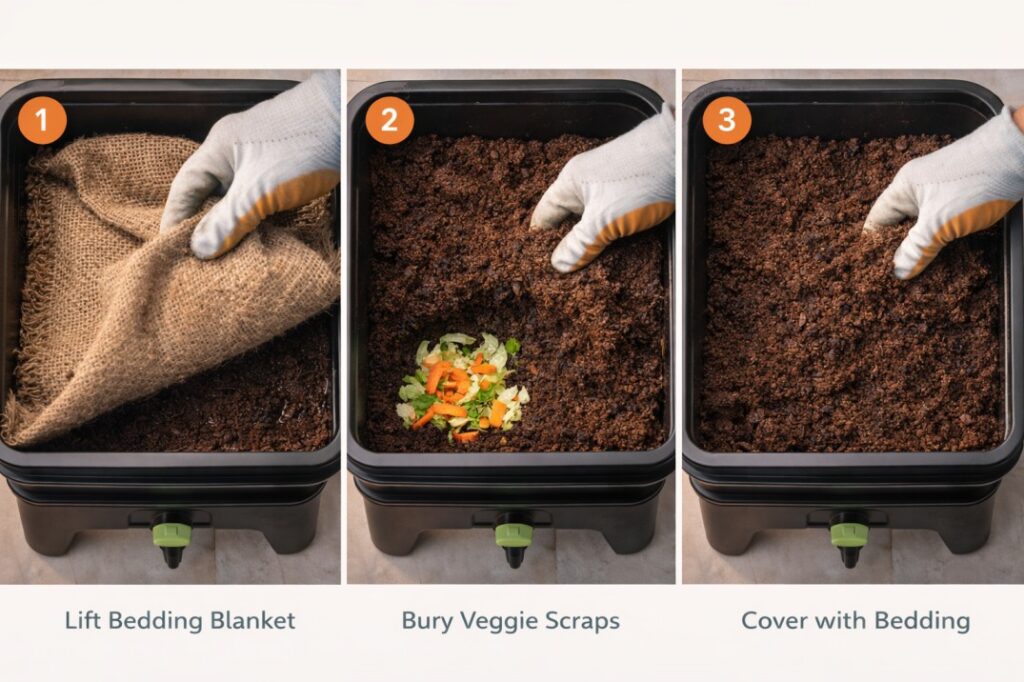
How to Feed:
- Lift the bedding blanket.
- Dig a small hole in a corner of the tray and bury your scraps.
- Cover the scraps completely with the surrounding bedding.
- Replace the bedding blanket and lid.
- Crucial Rule: Only feed again when the previous batch is mostly gone. Overfeeding is the #1 beginner mistake.
Step 6: Harvesting the Rewards – Castings & “Tea”
After 3-6 months, your first tray will be full of dark, crumbly castings with few visible scraps.
Harvesting Worm Castings (The Stress-Free Way):
- Stop adding food to the full tray for a week.
- Add a new tray on top with fresh, moist bedding and start burying food there.
- The hungry worms will naturally migrate upwards into the new tray over 2-3 weeks.
- Once most have moved, you can remove the bottom tray. The castings are ready! You can sift out any stragglers or egg cocoons and return them to the active tray.
Using the Liquid Gold (Leachate/Worm “Tea”):
- Drain the tap regularly to prevent a build-up.
- Important: This leachate is very potent and can be anaerobic. Always dilute it with water at a ratio of 1:10 (one part leachate to ten parts water) before using it to water your plants. It’s an incredible, nutrient-rich fertiliser.
Step 7: Troubleshooting – Keeping Your Farm Happy
Even the best-run worm farm for beginners Australia might have a hiccup. Here’s your fix-it guide.
- Problem: Fruit Flies.
- Cause: Exposed food.
- Fix: Bury food scraps properly. Ensure the lid is snug. Create a small fruit fly trap with apple cider vinegar.
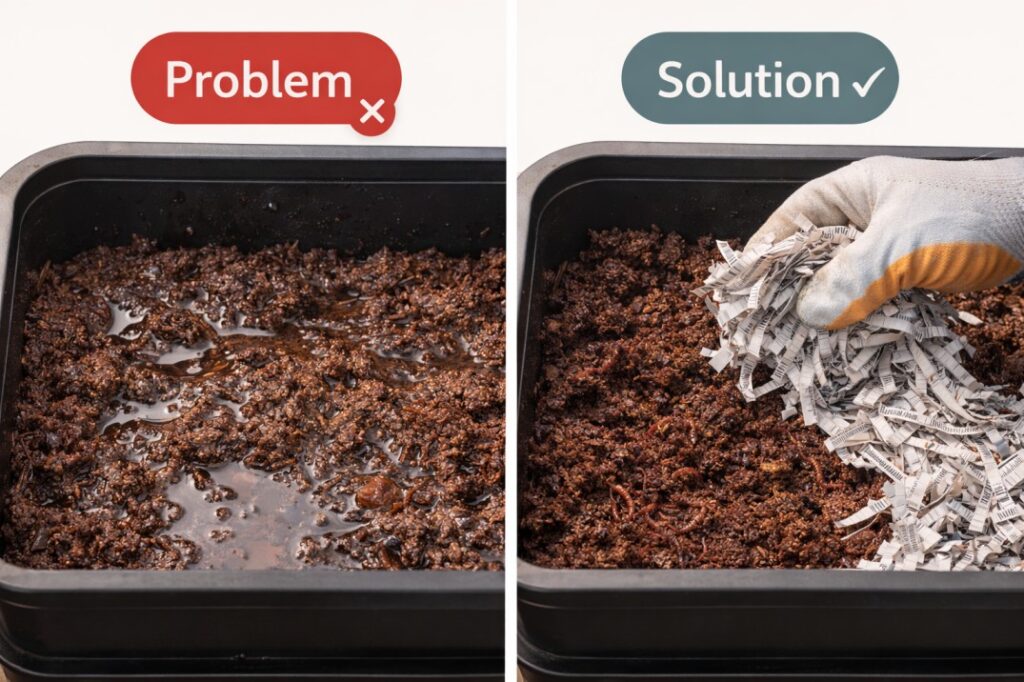
- Problem: Bad Odour.
- Cause: Overfeeding or too wet/not enough air.
- Fix: Stop feeding for 1-2 weeks. Add a handful of dry, shredded newspaper or cardboard to absorb moisture and restore balance. Fluff the bedding to add air.
- Problem: Worms Trying to Escape.
- Cause: Unhappy environment—too wet, too dry, too acidic, or not enough food.
- Fix: Check moisture. Add dry bedding if soggy, a light mist if dry. Add a handful of crushed eggshells to neutralise acidity. Ensure they have enough food (but aren’t being overfed!).
- Problem: Worms Dying or Disappearing.
- Cause: Extreme temperature or toxic food.
- Fix: Move the farm to a more temperate location immediately. Review your feeding list for any no-nos.
For more detailed, trusted advice on advanced care, the Australian City Farms and Community Gardens Network provides an excellent, in-depth guide to worm farming.
Worm Farm for Beginners Australia: Your Essential FAQs
Q: Will it smell bad?
A: A healthy, well-managed worm farm should have a pleasant, earthy smell like a forest floor. Bad smells only happen if it’s overfed, too wet, or has the wrong food (like meat). It’s a sign to check your maintenance.
Q: Do I have to touch the worms?
A: Not really! You can use a small trowel to bury food and gloves if you need to handle the castings. The worms stay buried in the bedding and want to avoid light, so direct contact is minimal.
Q: What happens when I go on holiday?
A: Worms are low-maintenance! Give them a good feed (bury a larger amount of scraps) before you leave for up to 3-4 weeks. They’ll be fine. For longer trips, ask a neighbour to pop in once to feed them.
Q: Can I use the worm castings on my vegetables?
A: Absolutely! Worm castings are one of the safest, best fertilisers for edible gardens. They are natural, chemical-free, and packed with nutrients. Mix them into your veggie patch soil or use them as a top dressing.
Q: My worm tea smells awful. Is it still good?
A: Smelly leachate means it’s become anaerobic (lacking oxygen). It’s best to discard it and not use it on plants. To prevent this, drain the tap weekly and ensure your farm isn’t too wet.
Your Simple Weekly & Monthly Worm Farm Routine
To make it effortless, here’s a simple checklist:
- Weekly: Feed your worms (bury scraps in a new corner). Drain and dilute the worm tea for your plants.
- Monthly: Check the moisture under the bedding blanket. Fluff the bedding gently.
- Every 3-6 Months: Harvest your worm castings when a tray is full.
Ready to Start Your Wriggly Journey?
Starting a worm farm for beginners Australia isn’t about achieving perfection. It’s about starting. It’s a small, living system that teaches you about cycles, patience, and the power of nature on a miniature scale.
It reduces your waste, creates incredible resources for your garden, and gives you a quiet sense of accomplishment. It’s the perfect companion project as you build a more sustainable home, alongside other steps like learning about backyard composting Australia or choosing the best native plants for your space.
Don’t wait. Order your kit this week. Your first thousand wriggly employees are ready to report for duty.
4 thoughts on “The Ultimate, No-Stress Guide to Your First Worm Farm for Beginners Australia: 7 Simple Steps to Start”