Disclosure: As an Amazon Associate, I earn from qualifying purchases. This post contains affiliate links, which means I may receive a commission if you click a link and purchase something I have recommended. This comes at no extra cost to you and helps support the site. Thank you!
Let me tell you about my first chicken coop mistake. It was ten years ago in my Melbourne backyard. I’d bought what looked like a cute little pre-fab coop from a big hardware store. It lasted three weeks before a fox figured out he could bend the flimsy wire with his nose. I came out one morning to feathers everywhere and that sinking feeling of failure. That’s when I decided: never again.
Here’s the truth they don’t tell you in those glossy catalogues: a proper DIY chicken coop backyard Australia isn’t just a box with some wire. It’s a fortress, a climate-controlled home, and the heart of your backyard ecosystem all in one. And building it yourself isn’t just about saving money (though you’ll save hundreds). It’s about building something that actually works in our unique Australian conditions, something that can handle a 45-degree Adelaide summer, a tropical Darwin wet season, and the craftiest suburban fox you’ve ever seen.
I’ve built four coops since that first disaster. Each one taught me something new. Now, I want to save you those hard lessons. This DIY chicken coop backyard Australia guide will walk you through everything I wish I’d known. We’re not just building a box, we’re creating a safe, happy home for creatures who’ll give you eggs, fertiliser, and endless entertainment. Let’s get building.
Table of Contents
Why a DIY Chicken Coop Backyard Australia Project is Your Smartest First Step
I get it. Looking at those beautiful (and expensive) pre-made coops online is tempting. They promise easy assembly and Instagram-worthy aesthetics. But let me share what I’ve learned after a decade of keeping chickens across three different Australian states.
Security isn’t an add-on, it’s the whole game. Most imported coops are designed for European or American predators. We have foxes that can scale six-foot fences, dogs that dig like pros, and in some areas, goannas that’ll raid nests. I’ve seen a determined fox bend cheap wire with its teeth. When you tackle a DIY chicken coop backyard Australia project, you control the security. You choose the 2mm thick wire, the digging-proof skirting, the locks that actually lock.
Our weather demands smart design. In Queensland, your main concern is ventilation and shade. In Tasmania, it’s winter insulation and damp protection. A one-size-fits-all coop can’t handle our climate diversity. When I built my current coop in Victoria, I installed removable shade cloth panels for summer and snug closing shutters for winter, something you’ll never find in a store-bought model.
The cost difference will shock you. My last proper DIY chicken coop backyard Australia build, a spacious setup for six hens, cost me $427 in materials. The closest equivalent pre-made was $1,895. That’s not just saving money, that’s freeing up budget for quality feeders, water systems, or even more chickens!
Step 1: The Golden Rules – Planning Your DIY Chicken Coop Backyard Australia Build
Before you sketch anything, let’s talk about the three principles that separate successful coops from problematic ones. I learned these through trial and error, and they’ve never failed me.
Space isn’t just about minimums, it’s about chicken psychology. Yes, technically chickens need about 1 square metre inside per 3 birds. But here’s what nobody tells you: cramped chickens get bored, and bored chickens turn nasty. They’ll peck each other, fight over nesting boxes, and develop stress behaviors. My rule? Build for double what you think you need. Planning for three hens? Build for six. You’ll thank me when you see how much happier they are with room to stretch, scratch, and do proper chicken things.
Australian predators have PhDs in breaking into coops. I once watched a suburban fox spend twenty minutes testing different parts of a neighbour’s coop. It wasn’t just trying to get in, it was studying the structure. Our DIY chicken coop backyard Australia designs need to be smarter. Think like a fox: can I dig under it? Can I chew through this wire? Can I lift this latch? Your answers all need to be “no.”
Location affects everything, including your relationship with neighbours. I made the mistake of putting my first coop too close to the fence line. When the wind blew just right, well, let’s just say my neighbours knew when I was cleaning it out. Position your coop with prevailing winds in mind, ensure drainage slopes away from the structure, and consider sunlight patterns through the seasons. A spot with morning sun and afternoon shade is pure gold in summer.
Step 2: Design & Materials – The Blueprint for Success
Now let’s get practical. You don’t need to be a master carpenter for a successful DIY chicken coop backyard Australia project. You just need smart design.
Start with the “why” behind each component:
- The elevated sleeping area isn’t just about keeping chickens dry, it taps into their instinct to roost high away from ground predators.
- Ventilation at the top (never at chicken level) prevents condensation that leads to frostbitten combs in winter and ammonia buildup year-round.
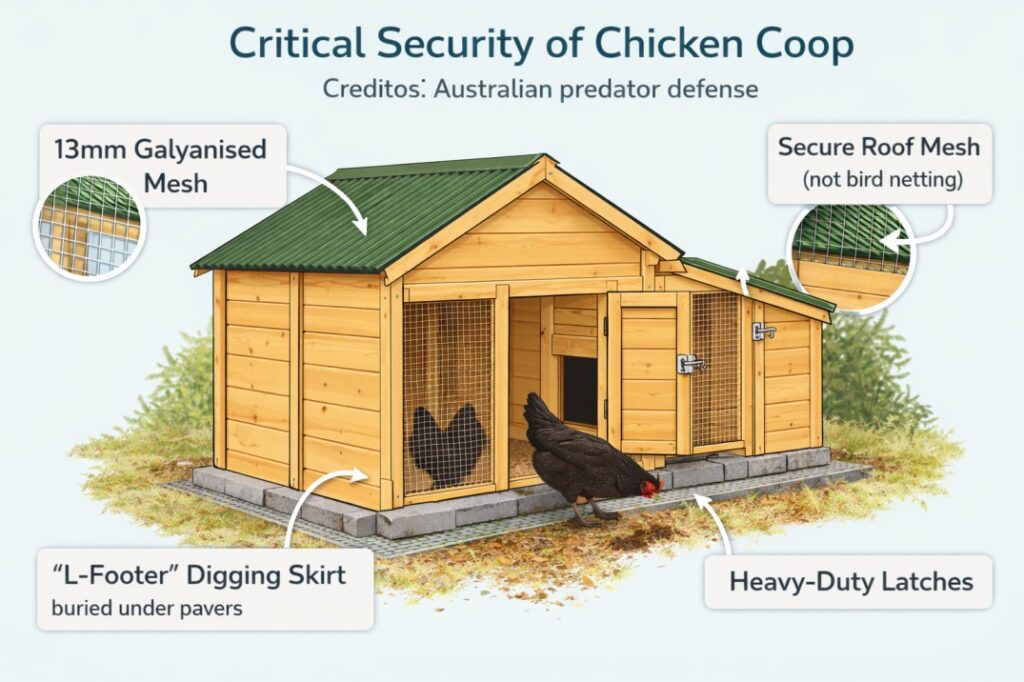
- The digging-proof skirt isn’t optional, it’s what stops foxes from doing what they do best.
The Australian-specific materials list that actually works:
- For the frame: 90mm x 35mm H3 treated pine is your friend. It’s affordable, readily available, and withstands our weather. Avoid CCA-treated timber if you can—while it’s highly durable, some gardeners prefer to avoid the copper/chrome/arsenic treatment near food-producing animals.
- For predator proofing: This is where you don’t skimp. Buy 13mm x 13mm galvanised wire mesh (often called “hardware cloth”) is what I use. It’s worth every cent. Chicken wire keeps chickens in; hardware cloth keeps predators out.
- For the roof: Colorbond steel beats clear polycarbonate every time. Yes, the clear stuff gives more light, but it turns coops into ovens in summer. A light-colored steel roof reflects heat.
- The secret weapon: A concrete paver perimeter. Place them around the outside edge of your run. Foxes hate digging near them, and they keep grass from growing right against your wire (reducing hiding spots for rats).
Step 3: The Build – Framing Your Fortress
Let’s walk through building a 2m x 1m coop with attached run, perfect for 3-4 hens. This is the exact design I’ve used successfully for years.
Part A: Building the Coop Box (The Night Fortress)
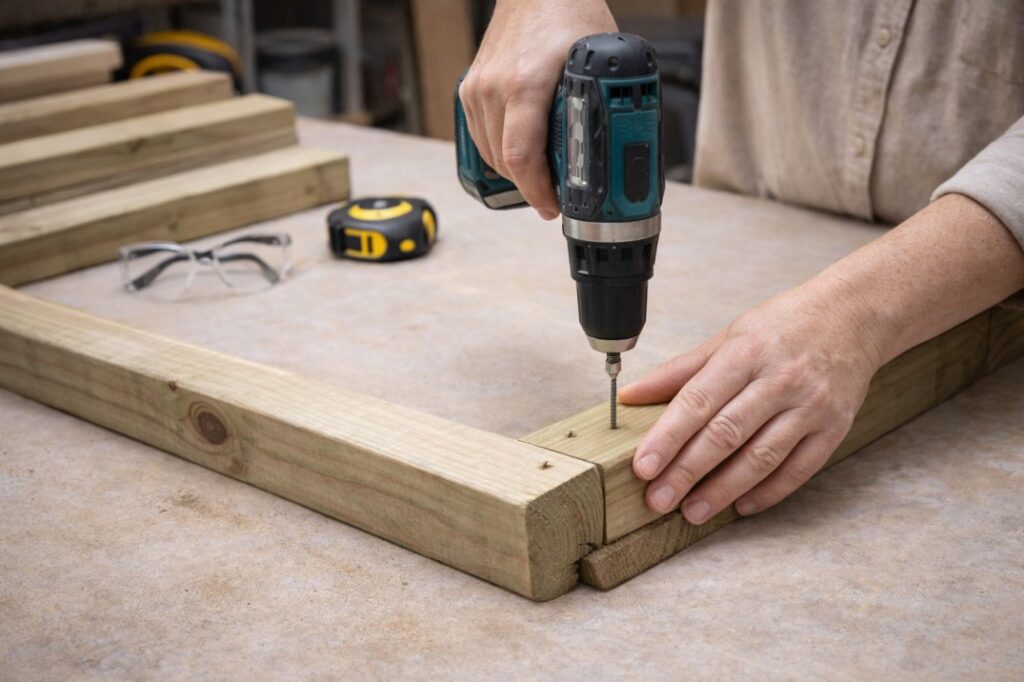
- The elevated start: Begin with a solid base frame using 90mm x 35mm timber. I use 100mm galvanised batten screws, they won’t work loose like nails. Elevate this frame on 200mm timber legs treated with termite-proofing paint where they meet the ground.
- Wall wisdom: Frame your walls with noggins (horizontal braces) every 600mm. This isn’t just structural, it gives you solid points to screw your cladding and perches into. When cutting your door opening, make it big enough to fit a shovel through. You’ll thank me during clean-outs.
- Roof reality: Pitch your roof at least 15 degrees. Any shallower and you’ll get water pooling. Use roofing screws with rubber washers, they won’t leak in heavy rain.
Pro tip from hard experience: Assemble the walls flat on the ground, then raise them into position. It’s easier, safer, and you get better joins.
Step 4: Fortifying the Run – The Fox-Proof Zone
The run is where 90% of predator problems happen. Here’s how to build it right the first time.
The dig-proofing method that actually works:
- The L-footer: Before installing your vertical wire, lay a 600mm wide strip of hardware cloth flat on the ground where your run walls will be.
- The connection: Bend this up 90 degrees at the wall line, then attach your vertical wall mesh to it with galvanised fencing staples every 100mm.
- The finish: Cover the flat section with 40mm of crusher dust or gravel. Foxes won’t dig through it, and it drains beautifully.
Roofing the run: Use the same hardware cloth for the roof, not bird netting. Netting sags, traps leaves, and won’t stop a determined possum or cat. Tension your roof wire properly using timber battens screwed over the edges.
The double-door system: Build a small anteroom between your main coop and run with two latched doors. This “airlock” prevents escapees when you’re entering, and gives you a safe space to separate birds if needed.
Step 5: The Smart Details – Making Life Easy
The difference between a chore and a pleasure often comes down to these small details.
Nesting boxes that chickens actually use:
- Dimensions: 30cm x 30cm x 30cm is perfect
- Location: Install them at least 50cm off the floor, in the darkest part of the coop
- Material: Line them with rubber stall matting instead of wood—it’s easier to clean and prevents mites
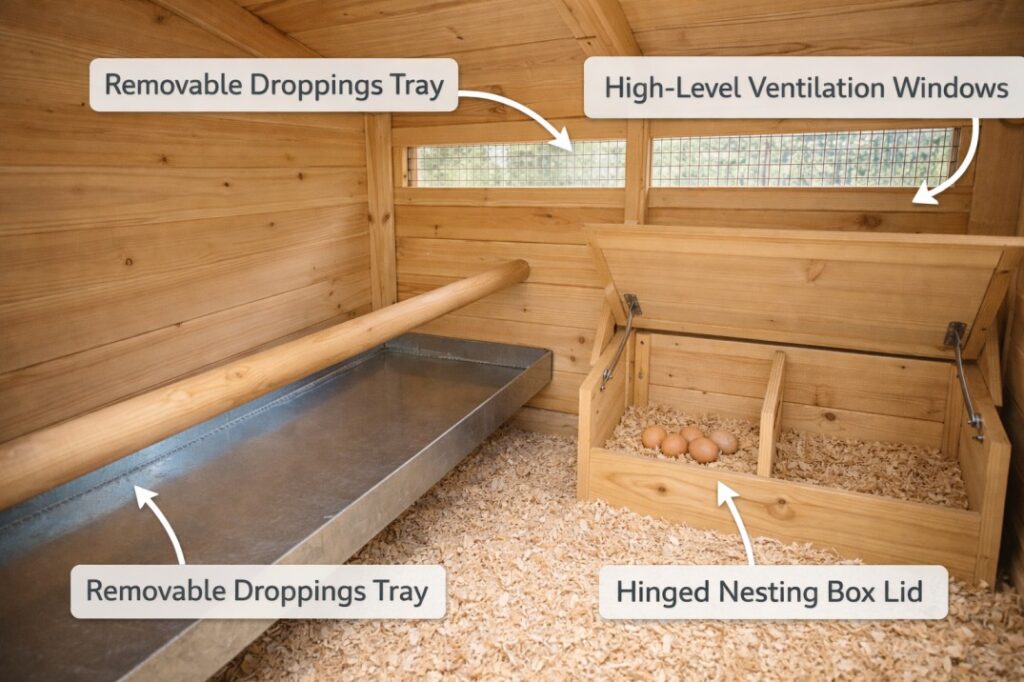
- The golden trick: Make the back of the nest boxes accessible from outside the coop via a hinged lid. No more crawling inside to collect eggs!
Perch science:
- Use rounded 50mm diameter timber (hardwood dowel from Bunnings works perfectly)
- Space perches 30cm apart horizontally, 45cm vertically if you have multiple levels
- Place them higher than your nest boxes (chickens instinctively roost at the highest point)
- The key insight: Allow 25cm of perch space per bird, but provide more. They like personal space when sleeping.
Ventilation that works in all seasons:
- Install wire-covered openings near the roof peak on at least two sides
- Make shutter covers for these openings that you can adjust seasonally
- Never create drafts at chicken level, their feet are vulnerable to frostbite
The easy-clean floor system I swear by:
- Install a removable plywood floor over your main coop floor
- Cover this with a layer of lime (helps control odour and bacteria)
- Then add your regular bedding (I use sugar cane mulch, it’s affordable and composts beautifully)
- Every full clean-out, simply lift the plywood sheet and hose it down
Step 6: Common Pitfalls & How to Avoid Them
Let me save you the mistakes I made so you don’t have to make them too.
Pitfall #1: The “weekend project” that takes a month
Reality: A proper DIY chicken coop backyard Australia build takes 2-3 full weekends if you’re working alone. Don’t rush it. I once tried to finish in a weekend and forgot the digging skirt. A fox had dug in within a week.
Pitfall #2: Underestimating Australian weather
Solution: In hot areas, install a misting system on a timer for summer. In cold areas, consider adding removable insulation panels for winter. Always orient your coop so the solid wall faces the prevailing cold wind.
Pitfall #3: Thinking small is simpler
Truth: A slightly larger coop is actually easier to maintain. You can get inside it to clean properly. You’re not constantly battling moisture buildup. And your chickens are healthier. Build bigger than you think you need.
Pitfall #4: The composting oversight
The bonus system: Here’s something most guides don’t mention, your chickens and your compost system are perfect partners. The soiled bedding from your coop is nitrogen-rich “green” material. When mixed with the carbon-rich “browns” from your garden, it creates the most incredible compost. I add my coop cleanings directly to my backyard composting Australia system. After proper hot composting, it becomes safe, nutrient-dense gold for the garden. It’s the ultimate closed-loop system. For managing kitchen scraps that become chicken treats and then compost ingredients, our composting kitchen waste Australia guide shows you how to complete the circle.
Step 7: Preparing for Your Flock
Your DIY chicken coop backyard Australia build is complete! Now let’s make it a home.
The bedding deep litter method:
Start with 15cm of sugar cane mulch or pine shavings. Each week, add a fresh 2cm layer and stir the existing bedding. This creates a composting action that generates heat in winter. Every 4-6 months, do a full clean-out—this material is already partially composted and perfect for your garden.
Food and water systems that save time:
- Install nipple waterers, they stay cleaner and waste less water
- Use a treadle feeder (birds step on it to open), it keeps rats and birds out
- Pro tip: Mount both on bricks so you’re not bending over constantly
The “chicken tractor” addition for small yards:
If space is limited, build a small movable run that you can relocate around your lawn. Your chickens get fresh grass, you get free lawn fertilisation, and your main run stays in better condition.
Introducing your chickens:
Keep new birds in the coop for 3-4 days before letting them into the run. This helps them establish it as “home” so they return to roost naturally. Feed and water them inside during this period.
Your DIY Chicken Coop Backyard Australia FAQ
Q: Do I REALLY need council approval? What happens if I don’t get it?
A: I can’t stress this enough: yes, you absolutely do. Regulations vary, but typically cover:
- Distance from boundaries (often 1-3 metres)
- Maximum number of birds (usually 3-10 in residential areas)
- Prohibition of roosters
- Proper waste management
I know someone in Brisbane who built a beautiful coop only to have council force them to remove it because it was 50cm too close to the fence. The process is usually straightforward—just a form and sometimes a small fee. It’s not worth the risk.
Q: How do I handle extreme heat? My area hits 40+ regularly.
A: Australian-specific strategies:
- Install a ceiling fan in the coop (proper agricultural fan, $65 from farm stores)
- Freeze 2L water bottles overnight, place them in the run during heatwaves
- Create a “cool zone” with damp hessian sacks draped over part of the run
- Provide electrolyte supplements in their water during heatwaves
- Crucial: Ensure unlimited access to fresh, cool water at all times
Q: What about snakes? I’m in a bushland area.
A: Snakes are after eggs and sometimes chicks. Prevention includes:
- Collect eggs twice daily
- Use fine 6mm mesh around the base if snakes are common
- Keep the area around the coop clear of long grass and hiding spots
- Consider installing a low vibration device (snakes don’t like constant ground vibration)
Q: Can I leave my chickens alone when I go on holiday?
A: With proper setup, yes for a long weekend (3-4 days). You’ll need:
- An automatic door opener/closer ($150-$300 but worth it)
- Large capacity feeders and waterers (calculate 120g feed per bird per day)
- A trustworthy neighbour to check daily is still ideal
Q: How do I integrate new chickens with my existing flock?
A: The quarantine-and-slow-introduction method:
- Keep new birds separate but visible for 2 weeks (watch for illness)
- Introduce them in a neutral territory first
- Do introductions at night when all birds are sleepy
- Expect some pecking order establishment, only intervene if there’s blood
- Have multiple food and water stations to reduce competition
The Real Reward of Your DIY Chicken Coop Backyard Australia Project
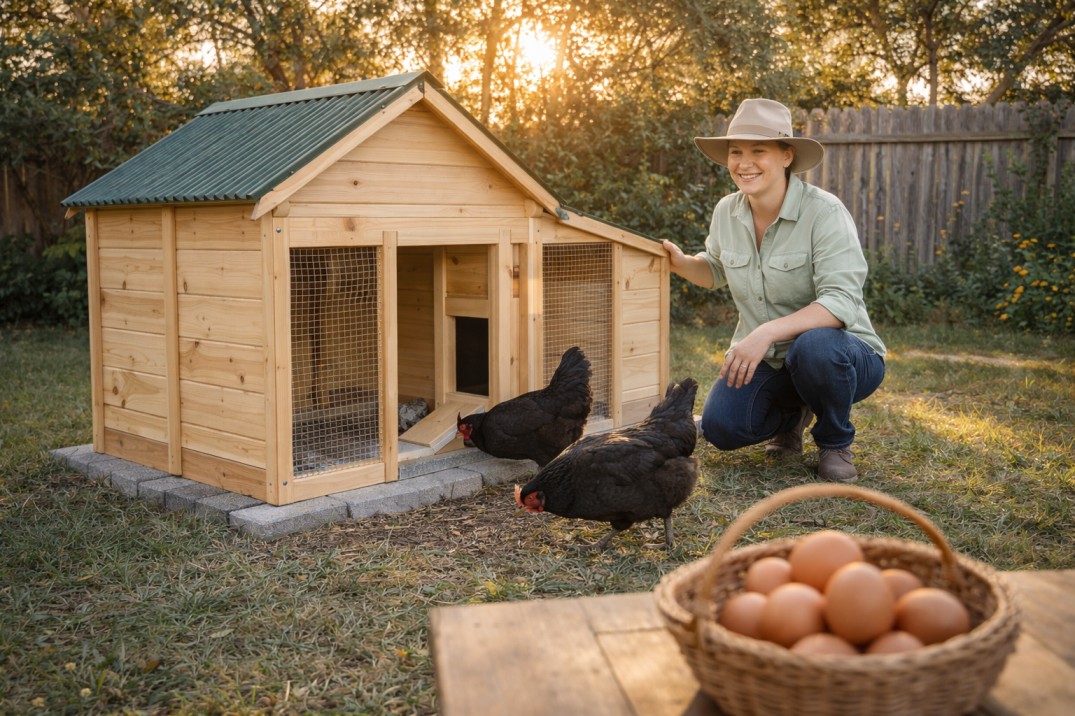
I still remember collecting my first egg from my first proper coop. It wasn’t just an egg, it was proof. Proof that I could build something functional and beautiful. Proof that I could provide for another creature. Proof that the suburban backyard could be more than just lawn.
Your DIY chicken coop backyard Australia journey will teach you more than woodworking. You’ll learn about animal behaviour, weather patterns, sustainable systems, and your own capacity to create. You’ll start noticing how the morning light hits your yard, where the cool spots are in summer, how your garden responds to chicken manure compost.
That first egg is coming. That moment when you realise your food web now includes creatures you care for. That connection to what you eat and how it’s produced. It all starts with a single decision to build something real.
So check your council regulations this week. Sketch your design. Feel the satisfaction of solving the fox-proofing puzzle. And get ready for the morning when you’ll walk out to your own safe, beautiful coop and find what you built has literally borne fruit.