Let’s talk about what’s sitting in your kitchen bin right now. Coffee grounds. Onion skins. That sad-looking lettuce at the bottom of the crisper. Every week, Australian households send about 3.1 million tonnes of food waste to landfill. That’s not just waste – it’s money you’ve spent, and it’s creating methane, a potent greenhouse gas.
But here’s the good news: that “waste” is actually gold for your garden. The real question isn’t whether to recycle it, but how. This brings us to the great Compost Bin vs Worm Farm Australia debate. It’s a question I’ve been asked dozens of times, and one I wrestled with myself for years.
I remember my first compost bin – a too-small plastic thing I shoved in a sunny corner. It turned into a slimy, smelly mess. My first worm farm? Let’s just say I learned the hard way that worms really don’t like going on holiday in January without a babysitter.
But after years of trial and error (and yes, more errors), I’ve found both systems can work beautifully. The secret is choosing the right one for your life, your space, and your garden’s needs. This guide will walk you through everything, from the nitty-gritty details to the real-life pros and cons. Let’s turn your scraps into something amazing.
Table of Contents
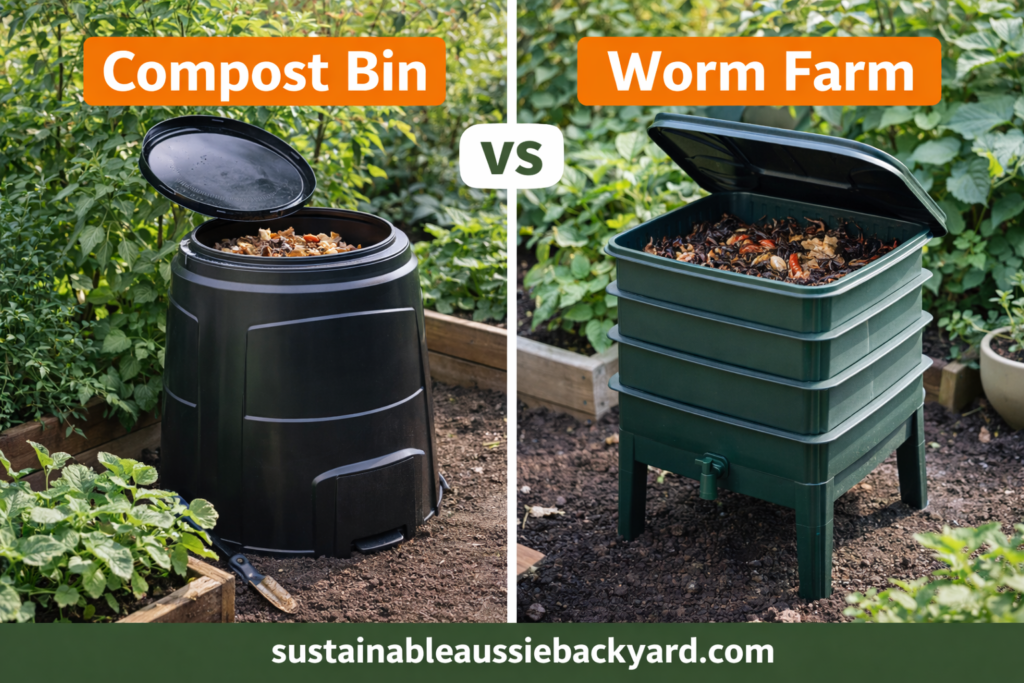
The Heart of the Matter: Two Different Philosophies
Before we dive into comparisons, let’s understand what we’re really talking about. This isn’t just about different boxes – it’s about different processes.
Composting is chemistry. It’s about creating the perfect conditions for billions of microbes (bacteria and fungi) to break down organic matter. These tiny organisms generate heat – sometimes enough to steam on a cold morning. The process transforms waste into humus-rich compost that smells like a forest floor after rain.
Worm farming is husbandry. You’re keeping livestock – just very small, wriggly livestock that eat your scraps. Tiger worms and Red Wigglers are eating machines that process food through their digestive systems, producing two valuable byproducts. You’re not just managing waste; you’re caring for living creatures.
This fundamental difference changes everything – from where you put the system to how you maintain it.
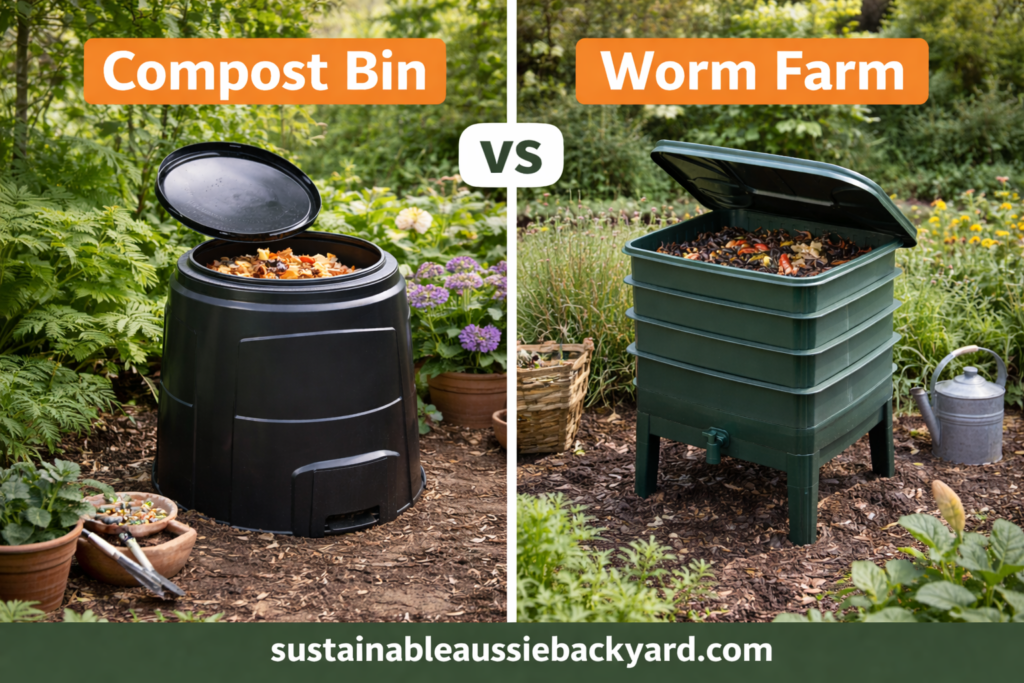
Difference 1: Space & Location – Where Will It Live?
This is often the deal-breaker. Australian backyards are getting smaller, and space is precious.
The Compost Bin Reality:
- Footprint: Needs at least 1m x 1m of space, preferably directly on soil
- Height: Most bins are about 1m tall
- Ideal Spot: A garden corner with partial shade works well. Full sun dries it out; deep shade keeps it too wet
- The Soil Connection: Essential! Placing it on soil lets worms and microbes migrate in and out, and allows for drainage
- Deal-breaker: If you only have concrete or a balcony, traditional composting is tricky
The Worm Farm Reality:
- Footprint: Surprisingly compact – most are about 60cm x 40cm (the size of two stacked storage tubs)
- Height: Usually around 70-80cm tall
- Ideal Spot: MUST be in shade. Under a tree, on a shaded balcony, in a carport, or even a garage corner
- Temperature Sensitive: Worms die if they get too hot. They slow down if too cold
- Perfect For: Apartments, courtyards, and homes with limited green space. In fact, if you’re working with a small space and want to maximize your garden’s potential, pairing a worm farm with the best rainwater tank for small backyards in Australia creates a powerful sustainability duo.
Space Winner: Worm farms for truly compact spaces; compost bins if you have even a small garden bed.
Difference 2: The Menu – What Can You Feed Them?
Getting the diet wrong is where most people fail. Each system has different “digestive” capabilities.
Compost Bin Diet (The Hearty Eater):
- Greens (Nitrogen-rich): Fruit/veggie scraps, coffee grounds, fresh grass clippings, tea bags
- Browns (Carbon-rich): Dry leaves, straw, shredded paper/cardboard, egg cartons
- The Balancing Act: You need roughly 2 parts brown to 1 part green
- Special Items: Garden waste! Prunings, weeds (without seeds), lawn clippings
- No-Go Zone: Meat, fish, dairy, oils, cooked foods with sauces
Worm Farm Diet (The Delicate Diner):
- Favorites: Soft fruit/veggie scraps (melon, pumpkin, leafy greens), coffee grounds, crushed eggshells
- In Moderation: Citrus, onion, potato peels – bury these deep and don’t overdo it
- Bedding: Soaked shredded newspaper or cardboard provides essential fiber
- Absolute No’s: Meat, dairy, oils, spicy foods, salty foods
- Pro Tip: Chop or blend scraps – smaller pieces break down faster
Key Insight: A compost bin handles your entire garden’s waste output. A worm farm specializes in kitchen scraps. If you have a garden generating clippings and leaves, a compost bin might be essential.
Difference 3: Maintenance & Time Commitment
How much work do you actually want to do? Be honest with yourself.
Compost Bin Chores:
- Weekly/Monthly: Turn the pile with a fork every 1-2 weeks (adds oxygen, prevents smells)
- Ongoing: Balance greens and browns as you add material
- Monitoring: Check moisture – should feel like a wrung-out sponge
- Seasonal: Harvest finished compost every 3-6 months
- Effort Level: Moderate physical effort, less frequent attention
Worm Farm Chores:
- Weekly: Add small handfuls of food 1-2 times per week
- Feeding Technique: Bury food in a different quadrant each time to prevent acid buildup
- Regular: Drain worm wee from the tap weekly to prevent drowning
- Quarterly: Harvest castings every 3-4 months (separating worms from finished castings)
- Effort Level: Gentle, more frequent attention but less physical work
The Time Truth: Worm farms need more regular but quicker check-ins. Compost needs less frequent but more intensive sessions.
Difference 4: Output – What Do You Actually Get?
This is where your effort pays off. Both produce valuable products, but they’re used differently.
From Your Compost Bin:
- Finished Compost: Dark, crumbly, earthy-smelling material
- Use It As: Soil conditioner, mulch, potting mix ingredient (sifted)
- How Much: A standard bin produces 50-100L of compost every 3-6 months
- Best For: Improving soil structure in garden beds, adding to planting holes for trees
From Your Worm Farm:
- Worm Castings: Dark, granular, odorless material – often called “black gold”
- Worm Wee (Leachate): Nutrient-rich liquid (must be diluted 10:1 with water)
- How Much: Smaller volume but more concentrated – a handful of castings goes a long way
- Best For: Pot plants, seedlings, veggie gardens – especially perfect for boosting your best vegetables to grow in Australia backyard like tomatoes and herbs
Product Difference: Compost feeds your soil; worm castings feed your plants. Think of compost as a balanced meal and worm castings as a vitamin supplement.
Difference 5: Speed & Timing
How patient are you? Different systems work at different paces.
Compost Bin Timeline:
- Hot Composting: 4-8 weeks with perfect conditions (regular turning, good balance)
- Cold Composting: 6-12 months with minimal intervention
- Factors Affecting Speed: Temperature, particle size, moisture, carbon/nitrogen balance
- Seasonal Impact: Slows dramatically in winter, speeds up in summer
Worm Farm Timeline:
- Scrap Processing: Worms eat roughly their body weight daily
- Castings Production: First harvest in 3-4 months
- Worm Wee: Starts within weeks of setup
- Temperature Dependent: Almost stops below 10°C, dangerous above 30°C
Speed Reality: For kitchen scraps alone, worms work faster. For bulk material including garden waste, a well-managed hot compost pile wins.
Difference 6: Common Problems & Solutions
Let’s troubleshoot before you even start.
Compost Bin Problems:
- Smelly/Slimy: Too many greens, not enough air. Add browns and turn.
- Dry & Nothing Happening: Too many browns, not enough moisture. Add greens and water.
- Flies: Exposed food. Always bury new scraps under brown layer.
- Rodents: Never add meat/dairy; use a bin with a secure lid and base.
Worm Farm Problems:
- Worms Trying to Escape: Conditions are wrong – usually too wet, acidic, or hot.
- Vinegar Flies: Food exposed on surface. Always bury scraps well.
- Bad Smell: Overfeeding or lack of air. Stop feeding, add dry bedding.
- Worms Dying: Temperature extreme, toxic food, or too acidic. Check conditions.
Prevention Tip: Both systems need balance. For compost, think “lasagne” – layers of greens and browns. For worms, think “moderation” – little and often.
Difference 7: Cost & Setup Complexity
What’s the initial investment?
Compost Bin Costs:
- Basic Plastic Bin: $50-$150
- Tumbling Composter: $150-$400 (easier turning)
- DIY Options: Free to $50 (pallets, chicken wire)
- Setup Time: 30 minutes to assemble
Worm Farm Costs:
- Starter Kit: $100-$250 (includes worms, trays, tap, bedding)
- Worm Refills: $30-$50 if needed
- DIY Options: $50-$100 (stacked storage tubs, but buy worms separately)
- Setup Time: 1-2 hours to set up bedding and introduce worms
Cost Winner: DIY compost bin is cheapest. But consider: worm farms often come with better instructions and support for beginners.
The Hybrid Approach: Why Not Both?
Here’s a secret many experienced gardeners know: you don’t have to choose. Running both systems gives you the best of everything.
How They Work Together:
- Worm Farm for daily kitchen scraps → produces castings for pots/veggies
- Compost Bin for garden waste, tougher scraps, shredded paper → produces bulk compost for garden beds
- The Synergy: Extra bedding from worm farm goes to compost; finished compost can house extra worms
This approach handles ALL your organic waste and gives you multiple products for different gardening needs. It’s the ultimate setup for creating a truly eco friendly backyard Australia ecosystem.
Your Personal Decision Checklist
Still unsure? Answer these questions:
You’re a Compost Person if you:
✓ Have a garden bed or lawn area
✓ Generate garden waste (grass, leaves, prunings)
✓ Don’t mind occasional physical work
✓ Want to improve soil in garden beds
✓ Are budget-conscious
✓ Have space away from living areas
You’re a Worm Farm Person if you:
✓ Live in an apartment or have only paved areas
✓ Mostly generate kitchen scraps
✓ Want faster results for food waste
✓ Want potent fertilizer for pot plants
✓ Don’t mind regular gentle maintenance
✓ Have a shaded, sheltered spot
✓ Are okay with handling worms
Start with BOTH if you:
✓ Have the space and budget
✓ Generate lots of kitchen AND garden waste
✓ Are serious about reducing all organic waste
✓ Want all possible gardening products
Getting Started: Your First Month
Whichever you choose, start smart:
For Compost:
- Choose a shady spot on soil
- Start with a 15cm layer of browns (twigs for drainage)
- Add your first kitchen scraps, then cover with more browns
- Turn every 2 weeks
- Be patient – it takes time to get going
For Worms:
- Set up bedding (damp shredded paper/cardboard)
- Add worms and let them settle for a week
- Start with small amounts of soft scraps
- Always bury food under bedding
- Drain liquid weekly
The Bigger Picture: Why This Matters
Beyond your garden, choosing a composting system connects you to a larger movement. You’re reducing landfill, cutting methane emissions, and building healthier soil. In a country as prone to drought as Australia, building organic matter in soil helps retain precious moisture.
Your choice between a compost bin vs worm farm Australia style isn’t just a gardening decision. It’s a vote for a more circular, sustainable way of living. It’s taking responsibility for your waste and transforming it into life for your garden.
Your Next Step
Don’t let perfect be the enemy of good. You don’t need a PhD in vermiculture or composting science. You just need to start.
Pick one system based on your answers to the checklist above. Buy it or build it this weekend. Make your mistakes, learn, and adjust. In three months, you’ll have something valuable from what was once waste. In six months, you’ll wonder why you didn’t start sooner.
The best system isn’t the perfect one – it’s the one you’ll actually use. So choose, set it up, and begin the satisfying journey of turning your scraps into something truly wonderful for your garden.
3 thoughts on “7 Key Differences: Your Ultimate Compost Bin vs Worm Farm Australia Guide”