Disclosure: As an Amazon Associate, I earn from qualifying purchases. This post contains affiliate links, which means I may receive a commission if you click a link and purchase something I have recommended. This comes at no extra cost to you and helps support the site. Thank you!
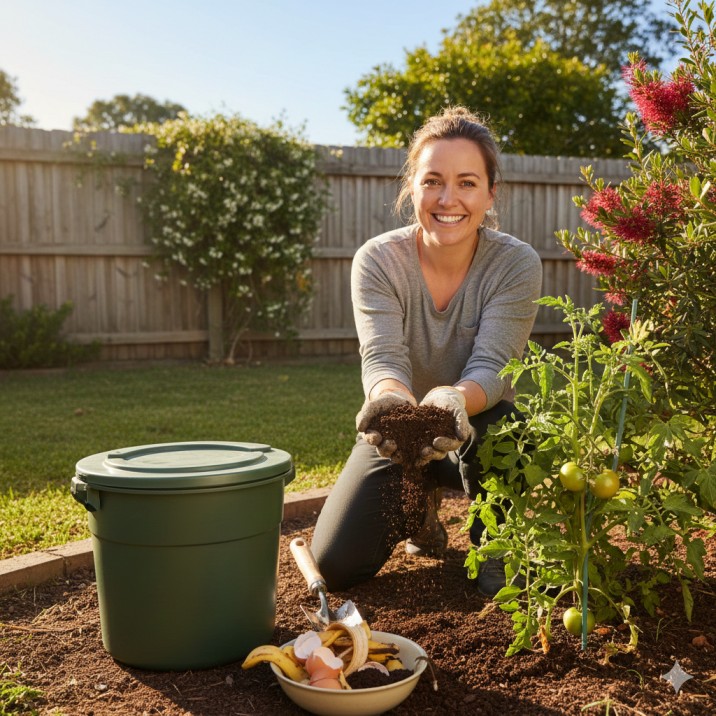
Starting backyard composting for beginners can feel a bit daunting. I get it. You might picture a smelly, messy pile that attracts rats. I thought the same thing.
My first attempt was a soggy, sad lump in the corner. Nothing happened for months. But then I learned the simple secrets. The real rules are easy. Now, my compost bin is my garden’s best friend. It turns my kitchen scraps into rich, beautiful food for my plants.
This guide is everything I wish I’d known. We’ll walk through it together, step-by-step. No jargon, no complex science. Just clear, simple advice that works in the Australian climate. Let’s turn your waste into wonder.
Table of Contents
Why Bother? The Brilliant Benefits of Backyard Composting for Beginners
Let’s talk about the “why.” This isn’t just for hardcore gardeners. It’s for anyone who wants to make a difference.
First, you save serious money. Stop buying bags of fertiliser and potting mix. Your homemade compost is a free, all-in-one soil superhero. It feeds your plants slowly and perfectly.
Second, you help our Aussie soil. Our land can be tough, sandy in some places, hard clay in others. Compost fixes that. It helps sand hold water and helps clay drain. This means you water less. In a country where every drop counts, that’s a big deal. It pairs perfectly with other water-saving tips.
Third, you slash your waste. Did you know food scraps in landfill create a terrible greenhouse gas called methane? It’s 25 times worse than carbon dioxide. When you compost, you’re fighting climate change from your own backyard. You’re closing the loop.
Finally, you grow happier plants. Compost gives your veggies and flowers the best possible start. Strong roots, better pest resistance, and bumper harvests. It’s that simple.
Step 1: Picking Your Perfect System (It’s Easier Than You Think!)
You don’t need a farm. There’s a system for every home. Let’s find yours.
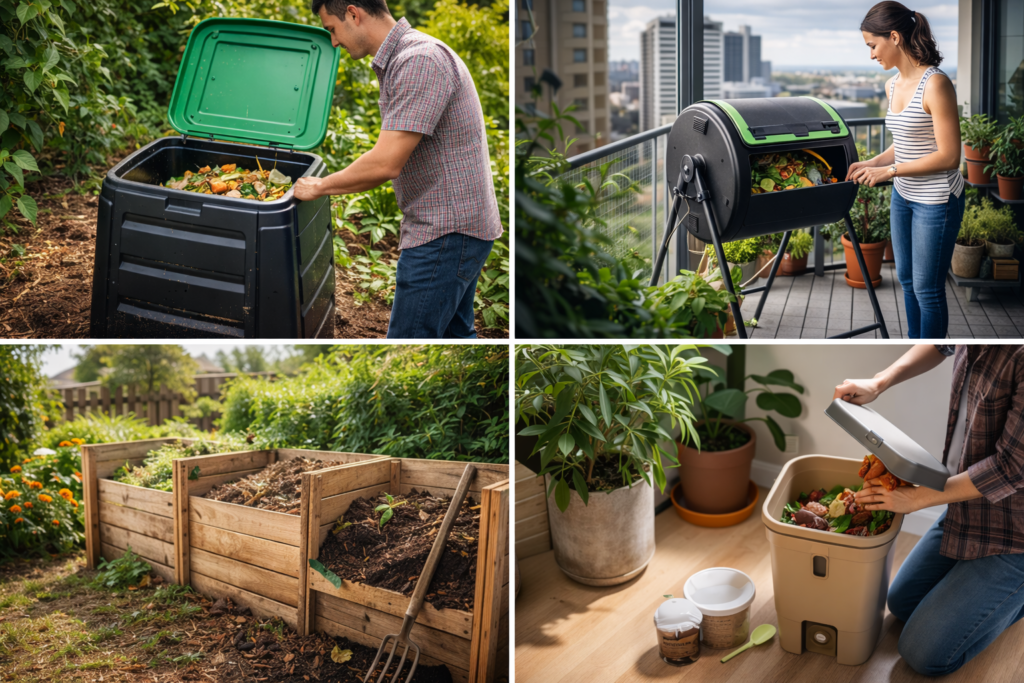
1. The Classic Bin (Best for Most Beginners)
This is your go-to. A simple, enclosed bin with a lid. It’s neat, keeps pests out, and holds heat and moisture well. Just plop it on soil in a spot with a bit of shade. You can buy one from your local council or hardware store as well. The Easy Start Compost Bin from Bunnings is a popular, affordable choice for many Aussies starting out.
2. The Compost Tumbler (The Fast & Easy Option)
Imagine a barrel on a stand. You put your scraps in, give the handle a spin every few days, and bam, fast compost! It’s great for small spaces and keeps critters away completely. It’s also easier on your back if bending over is a worry.
3. The Open Bay (For the Big Garden)
Made from old pallets or wire mesh, this is often a three-bay setup. You add to one, let one cook, and harvest from the finished one. It’s perfect if you have lots of garden waste like leaves and prunings.
4. The Bokashi Bin (For Apartments & All Food Waste)
Live in a flat? No soil? No problem. A Bokashi bin is a small, airtight bucket. You can put all your food scraps in it, even meat, dairy, and cooked leftovers. It works by fermentation, not traditional composting. After a few weeks, you bury the fermented waste in a garden or a pot. It’s a fantastic system.
5. The Worm Farm (Fun & Super Efficient)
Worms are composting champions! A worm farm is a tidy set of trays. Your scraps go in the top, the worms eat them, and you get liquid fertiliser (“worm tea”) and super-rich castings. Kids love it, and it works wonders on a balcony.
My tip for beginners? Start simple. Get a classic bin or a tumbler. You can always expand later.
Step 2: The Magic Recipe – Greens, Browns, and What to Skip
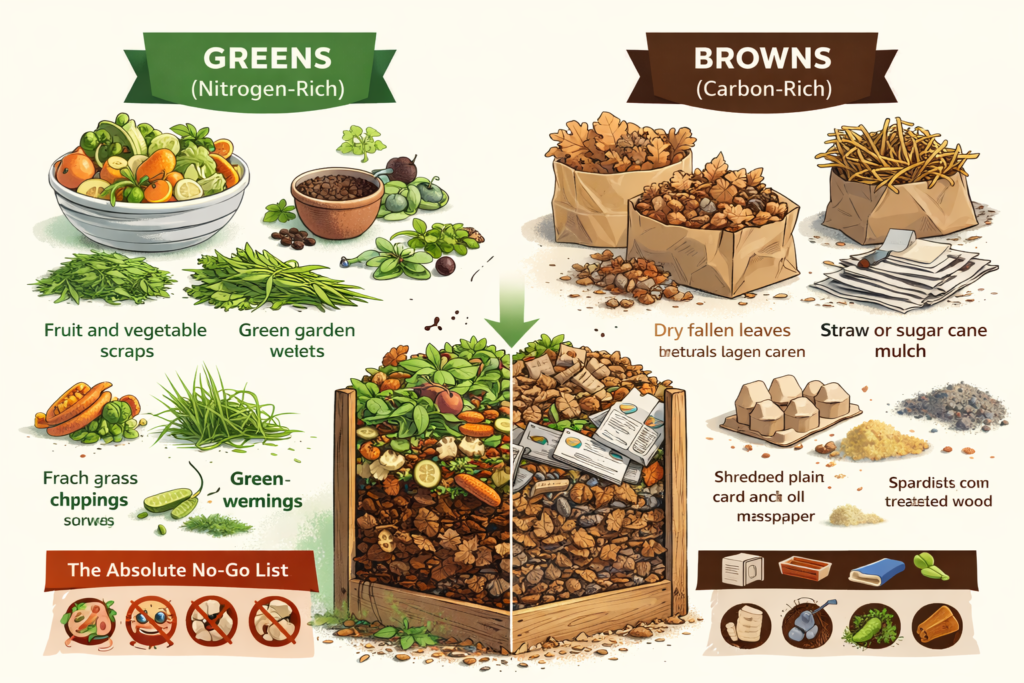
Think of your compost like a lasagne. It needs layers of two main things: Greens and Browns.
Greens (The “Wet & Fast” Stuff)
These are high in nitrogen. They get the pile cooking.
- Fruit and veggie scraps (chopped small)
- Coffee grounds and tea leaves (take the staple out of the bag!)
- Fresh grass clippings (add in thin layers, don’t dump a whole mower bag!)
- Green plant trimmings and weeds (before they have seeds!)
Browns (The “Dry & Bulky” Stuff)
These are high in carbon. They add air and stop the pile from getting slimy.
- Dry, fallen leaves (collect bags of these in autumn!)
- Straw or sugar cane mulch
- Shredded plain cardboard (egg cartons, toilet rolls, boxes)
- Shredded newspaper (black and white pages only)
- Untreated wood shavings
The Golden Rule: Try for a rough mix of 2 parts browns to 1 part greens. Too many greens? It gets stinky and wet. Too many browns? It just sits there. Don’t stress about measuring—just add more browns than you think you need.
The Absolute “No” List:
- Meat, bones, fish, dairy: Attracts pests and can smell.
- Diseased plants or weeds with seeds: You’ll spread the problem.
- Dog or cat poo: Can have nasty parasites.
- Glossy magazines or coloured paper: The inks can be bad.
- Chemically treated grass or wood: Can kill the good bugs.
For a trusted, in-depth look at what you can and can’t compost, the Australian Government’s Sustainability Victoria website has an excellent, clear guide that’s always up-to-date.
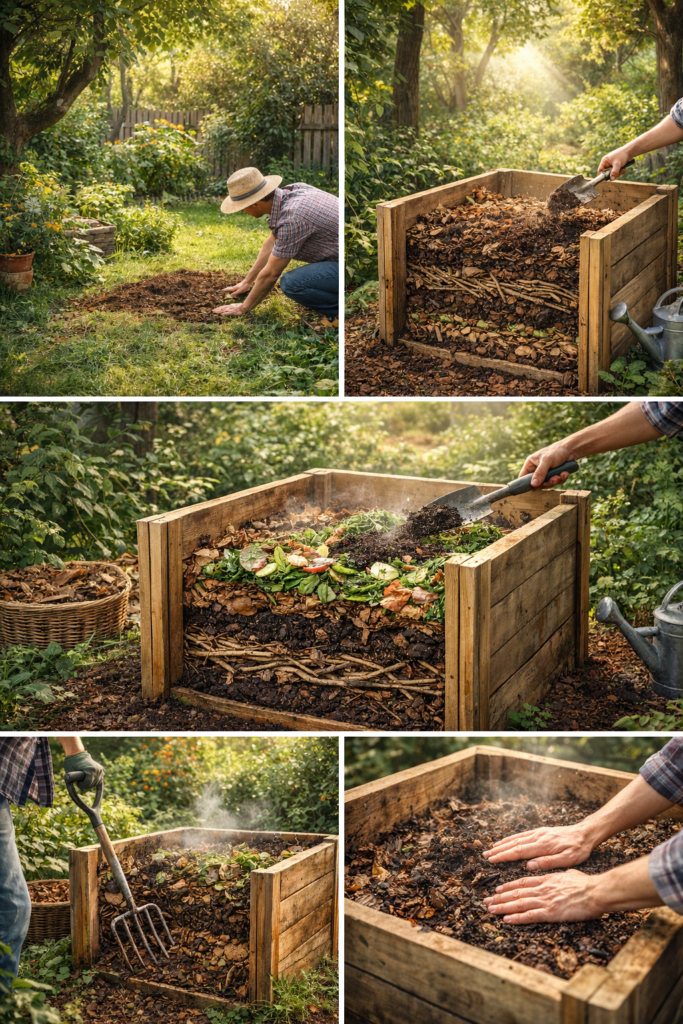
Step 3: Building & Maintaining Your First Pile – A Simple How-To
Let’s build your first successful pile. Follow these steps, and you’ll avoid the common mistakes.
1. Find the Right Spot.
Choose a level, well-drained spot. Dappled sunlight is ideal. Full Aussie sun will bake it dry. Deep shade will keep it cold and wet.
2. Start Your Compost Lasagne.
- Base Layer: Put down some small sticks or twigs. This helps air get underneath.
- Brown Layer: Add 10-15cm of browns (dry leaves, shredded cardboard).
- Green Layer: Add 5-10cm of your kitchen scraps.
- Soil/Starter: Sprinkle a handful of garden soil or finished compost. This adds the right microbes.
- Repeat: Keep adding layers. Always try to cover food scraps (greens) with a layer of browns. This is the #1 trick to stop flies.
- Moisture Check: As you build, make it damp like a wrung-out sponge. Use your hose if it’s dry.
3. The Power of Turning.
This is the secret to fast compost. Every week or two, use a garden fork to mix the whole pile up. Bring the stuff from the edges into the middle. This adds oxygen, which the tiny decomposers need to breathe. If you turn it regularly, you can have compost in 2-3 months. If you don’t, it’ll still happen, but it might take a year.
4. Just Check On It.
Stick your hand in. Is it warm in the middle? Great! That means it’s working. Is it dry? Add water. Is it soggy and smelly? Add browns and give it a turn. It’s a living thing, not a trash can.
Step 4: Fixing Common Problems – Your Aussie Compost Troubleshooting Guide
Don’t worry if things go a bit wrong. Every composter hits a snag. Here’s your fix-it chart.
| Problem | Likely Cause | The Quick Fix |
|---|---|---|
| Smells rotten | Too wet, not enough air. | Add loads of dry browns (cardboard, leaves) and turn it well. |
| Smells like ammonia | Too many greens (too much nitrogen). | Mix in carbon-rich browns immediately. |
| Pile is cold | Too dry, too small, or not enough greens. | Moisten it, add fresh greens, make sure the pile is at least 1m wide and tall. |
| Flies everywhere | Food scraps are exposed on top. | Always bury greens under 10cm of browns. A tight lid helps. |
| Not breaking down | Lack of moisture or nitrogen. | Add water and some grass clippings or coffee grounds, then turn. |
| Rats or possums | They’ve found a free snack. | Never add meat/dairy. Ensure your bin has a secure lid and no gaps. |
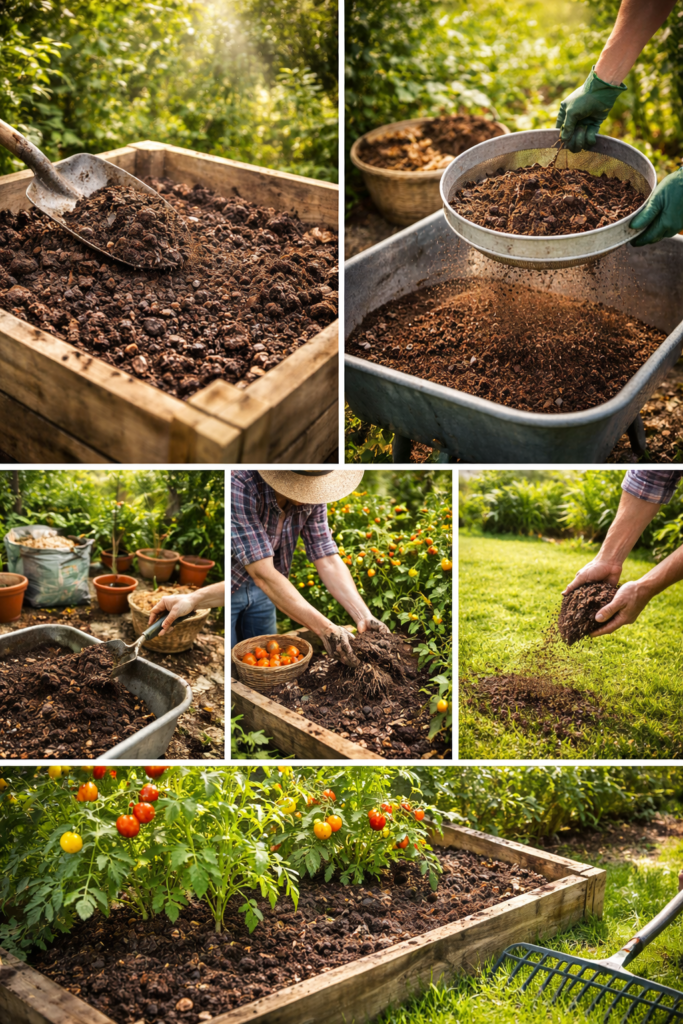
Step 5: Harvesting and Using Your “Black Gold”
Your patience is about to pay off! Finished compost is dark brown, crumbly, and smells like a forest floor. You shouldn’t see any old food scraps.
How to Harvest:
- Stop adding to one side of your bin for a few months.
- Scoop the beautiful, finished compost from the bottom.
- Use a simple garden sieve over a wheelbarrow. The fine stuff falls through for use. Any big chunks go back into the bin to keep breaking down.
How to Use Your Homemade Treasure:
- Soil Supercharger: Dig a few handfuls into your garden beds before planting.
- Potting Mix Booster: Mix one part compost with one part garden soil and one part coarse sand for a fantastic, free potting mix.
- Magic Mulch: Spread a 2-3cm layer on top of your soil around plants. It feeds them slowly and keeps weeds down.
- Lawn Love: Sieve it finely and rake a thin layer over your grass in spring.
- Veggie Patch Hero: It’s the ultimate food for growing your own. For the best results, build your perfect growing space in a DIY raised garden bed, where your compost can really shine.
Composting Through the Australian Seasons
Our weather changes, and so does your compost’s needs.
Summer: The heat can dry it out fast. Check moisture weekly. Don’t be afraid to give it a drink with the hose. A piece of old carpet or hessian on top helps keep moisture in.
Autumn: This is prime time! The weather is perfect, and you have endless browns (fallen leaves). Collect bags of dry leaves now to use all year round.
Winter: Everything slows down in the cold. Insulate your pile with a thick layer of straw or leaves on top. You don’t need to turn it as much.
Spring: As things warm up, give your pile a good turn. Add all those fresh greens from your garden clean-up. Harvest the compost you started last autumn for your spring planting frenzy!
The Bigger Picture: More Than Just a Bin
Starting backyard composting for beginners is a small act with a huge ripple effect. You’re not just managing waste. You’re taking part in nature’s oldest cycle: life, decay, and new life.
You’ll feel more connected to your home, your garden, and what you consume. You reduce the load on our landfill sites. You build rich, living soil that can handle drought. You learn a powerful lesson in making something precious from what we throw away.
The best part? It gets easier every single day. Soon, tossing a banana peel in the kitchen bin will feel as strange as throwing money in the trash.
Your first try doesn’t need to be perfect. Start this weekend. Get a container for your kitchen bench. Find a spot for a bin. Save your next lot of veggie peelings. Layer them with some torn-up egg carton and a handful of leaves.
Before you know it, you’ll have created real magic. You’ll have made black gold. And that, my friend, is the most satisfying harvest of all.
1 thought on “The Ultimate 5-Step Guide to Backyard Composting for Beginners in Australia”