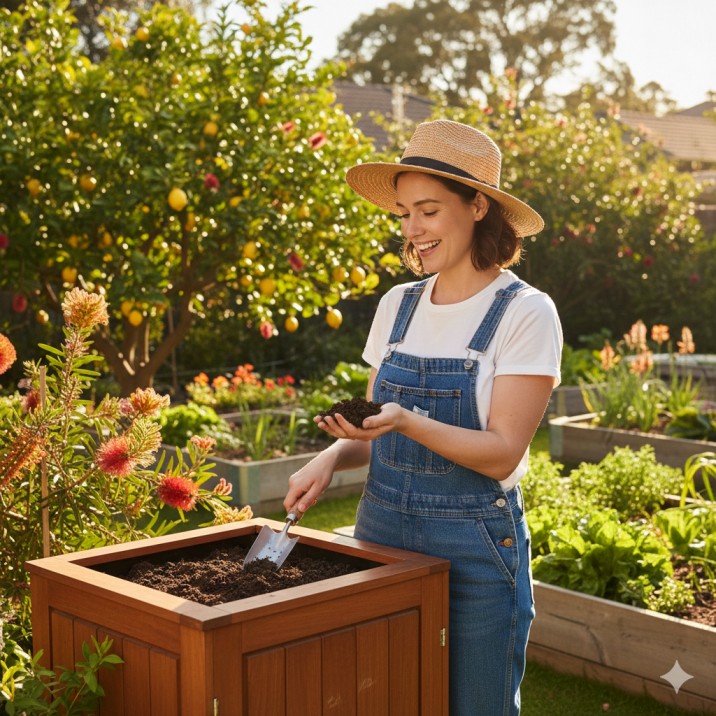
Look at your kitchen bin right now. Go on, take a quick glance. What do you see? Coffee grounds, a banana peel, maybe some wilted lettuce leaves. Now, look out your window at your garden. See that soil? Could it use a boost? Feel that twinge of guilt, knowing one could feed the other? That quiet connection between your waste and your garden’s potential is the whole point.
I get it. Backyard composting Australia feels like it should be simple, but the advice out there is a mess. One source says to turn your pile daily, another says never touch it. Some swear you need fancy gear, others say a hole in the ground works fine. It’s enough to make you give up before you even start.
Here’s the truth I learned after years of trial and error: successful backyard composting Australia isn’t about following a hundred rules. It’s about understanding a few unbreakable principles of nature and applying them to your space, your climate, and your lifestyle.
This isn’t just another article. Consider this your 2024 field manual. A start-to-finish, no-fluff blueprint that cuts through the noise. We’ll walk through five concrete steps, tackle every “what if” you can think of, and give you the confidence to not just start composting, but to succeed at it. Your garden and the planet are waiting.
Table of Contents
Why Your Backyard is the Perfect Place to Start a Revolution
Let’s talk about impact. Real, tangible impact. When you commit to backyard composting Australia, you’re doing so much more than making dirt.
First, you’re declaring independence from a broken system. Did you know that nearly half of what ends up in the average Australian household red-lid bin is organic material? That’s food and garden waste. According to the experts at the Australian Government’s Department of Climate Change, Energy, the Environment and Water, this waste in landfill is a disaster. It decomposes without oxygen, producing methane a greenhouse gas over 25 times more potent than carbon dioxide over a 100-year period. By composting, you are personally intercepting this waste stream. You’re stopping methane at its source and turning a problem into the ultimate solution for your own patch of earth. It’s the single most effective environmental action you can take without leaving your home.
Second, you’re building the foundation for a truly resilient garden. Australian soil is tough. It’s often sandy and thirsty, or heavy clay that turns to concrete in summer. Compost is the universal healer. It’s not just a fertiliser; it’s a soil conditioner. It acts like a sponge in sandy soil, holding onto precious water, a critical benefit as we face hotter, drier summers. In clay, it creates tiny passageways for air and water to move, loosening it up and letting roots breathe. This creates a thriving ecosystem for worms and beneficial microbes, which in turn feed your plants. It’s the cornerstone of any sustainable Aussie backyard.
Finally, let’s talk about pure, practical magic. There is an undeniable satisfaction in closing the loop. You take scraps that were destined to be a problem, you apply a little knowledge, and you transform them into the very thing your garden craves most. It saves you money on rubbish bags, store-bought soil, and fertilisers. It connects you to the natural cycle of growth and decay in the most hands-on way possible. It’s alchemy, and you’re the alchemist.
The 5-Step, No-Fail Blueprint for Backyard Composting Australia
Forget complicated flowcharts. Strip it right back. Here is the only system you need to remember. We’ll build it together, step by step.
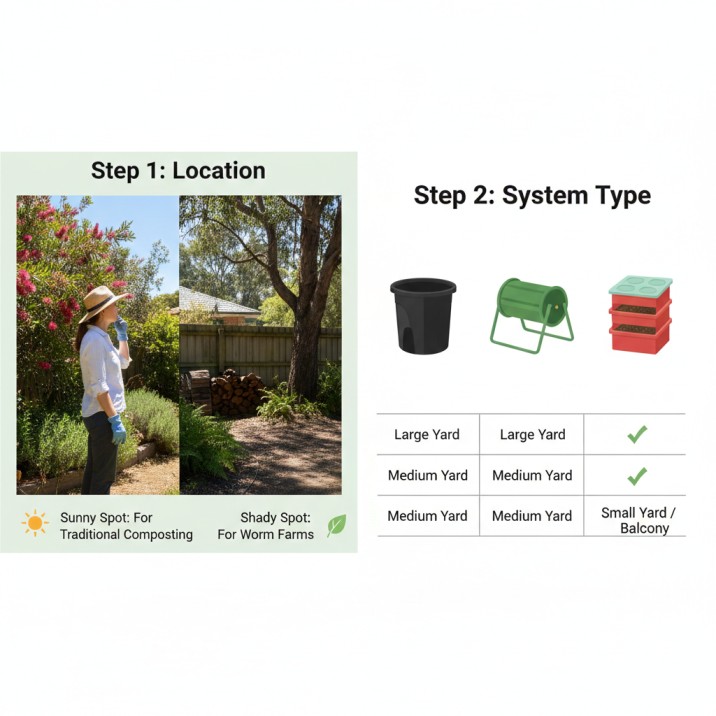
Step 1: The Foundation – Choosing Your Battle Station & Location
You wouldn’t build a house without a plan. Don’t start composting without one either. This first step is about setting up for success.
Part A: The Perfect Spot
Think of your compost pile as a living entity. It needs the right home.
- Sun & Shade: Aim for dappled sunlight or partial shade. Full, blazing Australian sun will cook the moisture right out of it. Deep, full shade can keep it too cold and wet. A spot that gets morning sun and afternoon shade is ideal.
- Access & Convenience: If it’s a trek through mud in winter, you won’t use it. Choose a spot that’s easy to get to from your kitchen door. Make the habit effortless.
- Drainage & Surface: Place it on bare soil, not concrete or paving. This allows worms and microbes to migrate up into the pile and lets excess moisture drain away. If you only have a paved area, that’s okay, you’ll just need to be more mindful of moisture levels.
Part B: Picking Your Vessel
The right bin makes all the difference. It’s not one-size-fits-all.
- The Simple Starters: A basic, lidded compost bin (often available for under $50 from your local council) is the perfect, no-fuss entry point. It’s contained, keeps pests out, and is easy to manage.
- The Speed Demons: If you want faster results and hate the idea of turning a pile with a fork, invest in a tumbler. You load it and turn a crank every few days. It’s more expensive but incredibly efficient.
- The Volume Masters: For large gardens, a DIY three-bay system made from timber or pallets is the gold standard. You turn the compost from one bay to the next, always having a steady supply in different stages.
Still unsure which system is your perfect match? Our detailed guide on finding the best compost bin Australia has to offer breaks down every option for every budget and space.
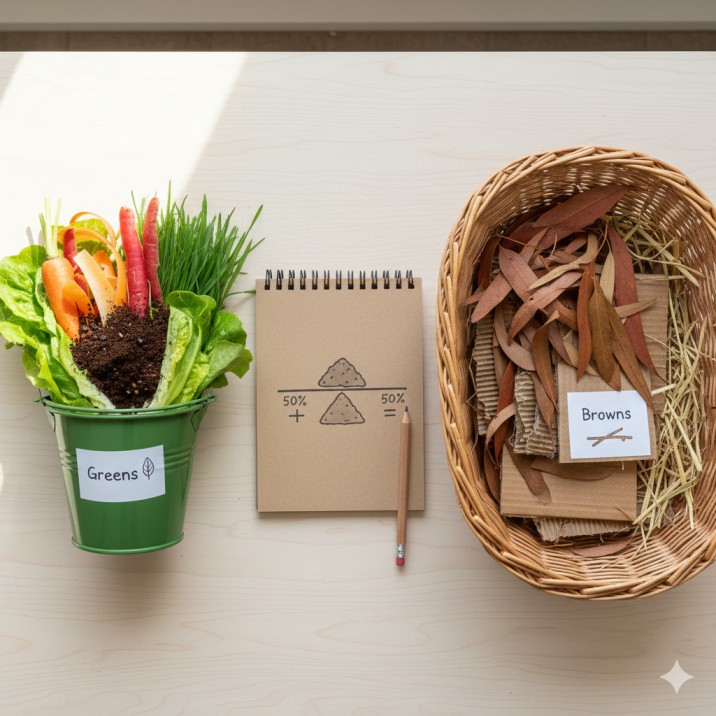
Step 2: The Recipe – Mastering the “Greens & Browns” Balance
This is the secret sauce. All successful backyard composting Australia comes down to balancing two ingredients. Think of it as a lasagne, not a science experiment.
“Greens” (The Nitrogen Team – The Activators)
These are your moist, nutrient-rich materials. They provide the protein that fuels the decomposing microbes and generate heat.
- Kitchen Heroes: Fruit & vegetable scraps, coffee grounds, tea leaves (remove bags if non-biodegradable).
- Garden Fresh: Fresh grass clippings, green plant prunings, annual weeds (pulled before they go to seed!).
- Other: Manure from herbivores like chickens, cows, or horses (a powerful activator).
“Browns” (The Carbon Crew – The Balancers)
These are your dry, bulky materials. They provide the energy (carbon), create vital air pockets, and soak up excess moisture to prevent a smelly mess.
- Garden Gold: Dry autumn leaves (collect and store bags of them!), straw, sugar cane mulch, woody prunings (chopped small).
- Household Helpers: Shredded plain cardboard (no glossy coatings), shredded newspaper (black and white only), torn-up egg cartons, untreated wood chips.
The Golden, Unbreakable Rule:
For every handful of “greens” you add, add a handful of “browns.” See a bucket of veggie scraps? Cover it with a bucket of dry leaves or shredded paper. This simple act is the single greatest key to odour-free, pest-free, fast-working compost.
Step 3: The Engine Room – Building, Maintaining & Troubleshooting
Now we bring it to life. Your pile is a living engine, and you are its gentle mechanic.
The Build:
- Start your base with a 10cm layer of coarse twigs or small branches. This is critical for airflow from the bottom.
- Begin your “lasagne.” Add a 15-20cm layer of “browns.”
- Add a 5-10cm layer of “greens.”
- Lightly water the layer so it feels like a damp, wrung-out sponge.
- Repeat: Browns, Greens, Moisture. A little garden soil or finished compost sprinkled between layers can introduce beneficial microbes.
- Top it all off with a final blanket of “browns” to discourage flies.
The Maintenance Routine:
- The Turn (Weekly/Bi-weekly): After 1-2 weeks, use a garden fork to turn the entire pile. Move the outer, drier material to the centre. This injects oxygen, which is like rocket fuel for the microbes. It reignites the heat and speeds decomposition dramatically.
- The Moisture Check (The Squeeze Test): Grab a handful from the centre. Squeeze it. If one or two drops of water come out, it’s perfect. If it’s dripping, it’s too wet, add more “browns” and turn. If it’s dusty and falls apart, it’s too dry, water it lightly as you turn.
Troubleshooting: Your Quick-Fix Guide
- Problem: It smells like rotten eggs or ammonia.
- Diagnosis: Too wet and/or not enough air. It’s anaerobic (without oxygen).
- Fix: Turn the pile immediately to add air. Mix in a generous amount of dry “browns” like straw or shredded cardboard.
- Problem: It’s not heating up at all.
- Diagnosis: Too dry, too small, or needs more “greens.”
- Fix: Check moisture. If dry, water it. Ensure your pile is at least 1m x 1m to retain heat. Add a high-nitrogen “green” like fresh grass clippings or manure and turn it in.
- Problem: There are flies or pests hanging around.
- Diagnosis: Food scraps are exposed.
- Fix: This is non-negotiable—always bury new kitchen scraps under at least 10cm of “browns” or finished compost. A secure lid is also essential.
For more expert-backed solutions, the legendary team at Gardening Australia has an indispensable, trusted resource on their compost problems page.

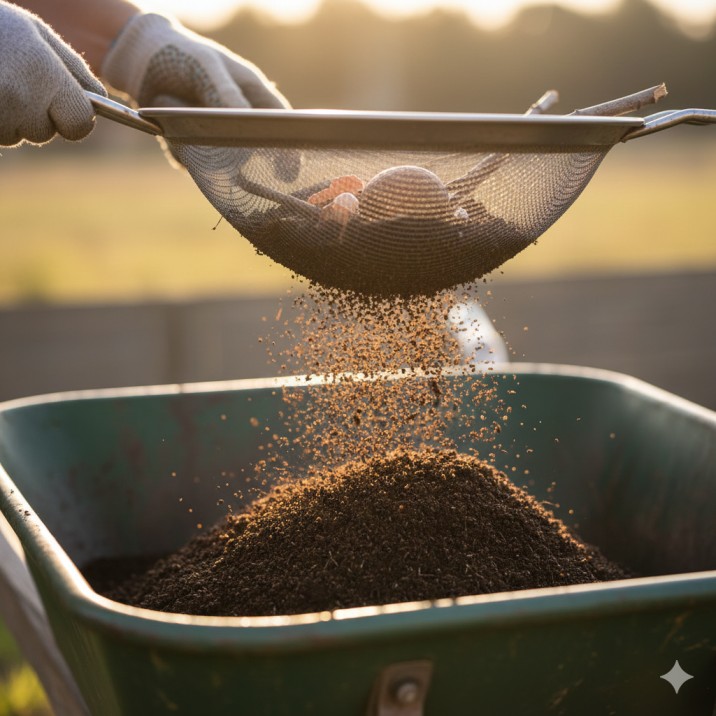
Step 4: The Harvest – Recognising and Collecting Your “Black Gold”
The moment of truth. How do you know it’s ready?
- Look: It will be uniformly dark brown or black, crumbly, and earthy. You should not be able to identify the original scraps (maybe an occasional eggshell or twig).
- Smell: It has a sweet, pleasant, forest-floor smell, not sour, rotten, or acidic.
- Feel: It’s cool to the touch (the microbial activity has finished).
How to Harvest:
- From a single bin: Stop adding new material for a month. The finished compost will settle at the bottom. Use the lower door or simply scoop it out from the bottom with a trowel.
- From a tumbler: Empty the entire contents onto a tarp. Sieve out the finished compost, returning any unfinished chunks to the tumbler to start the next batch.
- From a three-bay system: The compost in your third and oldest bay is ready to use. Simply shovel it out.
Step 5: The Reward – How to Use Your Compost to Transform Your Garden
This is where you see the magic. Your backyard composting Australia efforts pay dividends here.
- Soil Amendment: Before planting new beds or seasons, work a 5-10cm layer of compost into the top 15-20cm of soil. This is the ultimate gift to your garden’s foundation.
- Top Dressing (My Favourite Trick): In spring and autumn, sprinkle a 2-3cm layer of compost around the base of established trees, shrubs, and perennials. Water it in. It slowly feeds the plants and improves the soil as it washes down.
- Potting Mix: Create a powerful, living potting mix by combining one part compost with one part coarse sand or perlite and one part coconut coir or good-quality potting mix.
- Lawn Tonic: Sieve compost to make it fine. Spread a thin (1cm) layer over your lawn and lightly rake it in. It will improve the soil structure beneath the grass.
This homemade “black gold” is the perfect food for creating a resilient, low-maintenance garden. To see what thrives when fed with such rich, living soil, explore our guide to the best native plants for a sustainable Aussie backyard.
The Advanced Moves: Taking Your Backyard Composting Australia to the Next Level
Once you’ve mastered the basics, you can optimise for speed and volume.
- Chop It Up: Smaller pieces break down faster. Give your scraps a rough chop and shred your cardboard and leaves.
- The “Hot Compost” Challenge: Aim for a pile that’s at least 1 cubic metre. Turn it every 3-5 days. With the right balance, it can heat up to 60-70°C, killing weed seeds and pathogens and producing compost in just a few weeks.
- Composting Grass Clippings: Never add thick layers of fresh grass clippings alone—they will form a slimy, smelly mat. Always mix them thoroughly with ample “browns.”
Backyard Composting Australia: Your FAQs Answered
Q: Can I compost if I have a small yard?
A: Absolutely! A compact, lidded compost bin or a worm farm are perfect for small spaces. You can even try a Bokashi bucket system for indoor fermentation.
Q: Will it attract rats and cockroaches?
A: A well-managed compost pile with a secure lid and no meat/dairy won’t attract pests. Burying food scraps under “browns” is your best defence.
Q: How long does it take?
A: In a well-maintained pile, you can have compost in 3-6 months. Tumblers can be faster (4-8 weeks). It depends on your climate, materials, and how often you turn it.
Q: Can I add citrus, onions, and weeds?
A: Yes, in moderation. Chop citrus and onion peels. Only add weeds that haven’t gone to seed, as most home compost piles don’t get hot enough to kill weed seeds.
Your Action Plan Starts This Weekend
The biggest barrier is starting. So here’s your first, zero-cost assignment:
- Get a kitchen caddy. Use an old ice cream container with a lid or a small bowl.
- For one week, save all your fruit and veggie scraps. Notice how much you collect.
- This weekend, find your spot. Walk your yard with the location criteria in mind.
- Acquire your bin. Order one online, visit the hardware store, or call your council.
Backyard composting Australia isn’t about perfection. It’s about participation. It’s about stepping into the cycle of nature and playing your part. You will learn as you go. You might have a batch that goes soggy. That’s okay. Turn it, fix it, and keep going.
The reward is a garden that bursts with life, a bin that’s never too full, and the profound satisfaction of knowing you’re making a real difference, right where you live.
Start your pile. Your garden’s future is waiting.
4 thoughts on “The Amazing 5-Step for Backyard Composting Australia in 2026”