Your Complete DIY Raised Garden Bed Guide Australia: Let’s Grow Up!
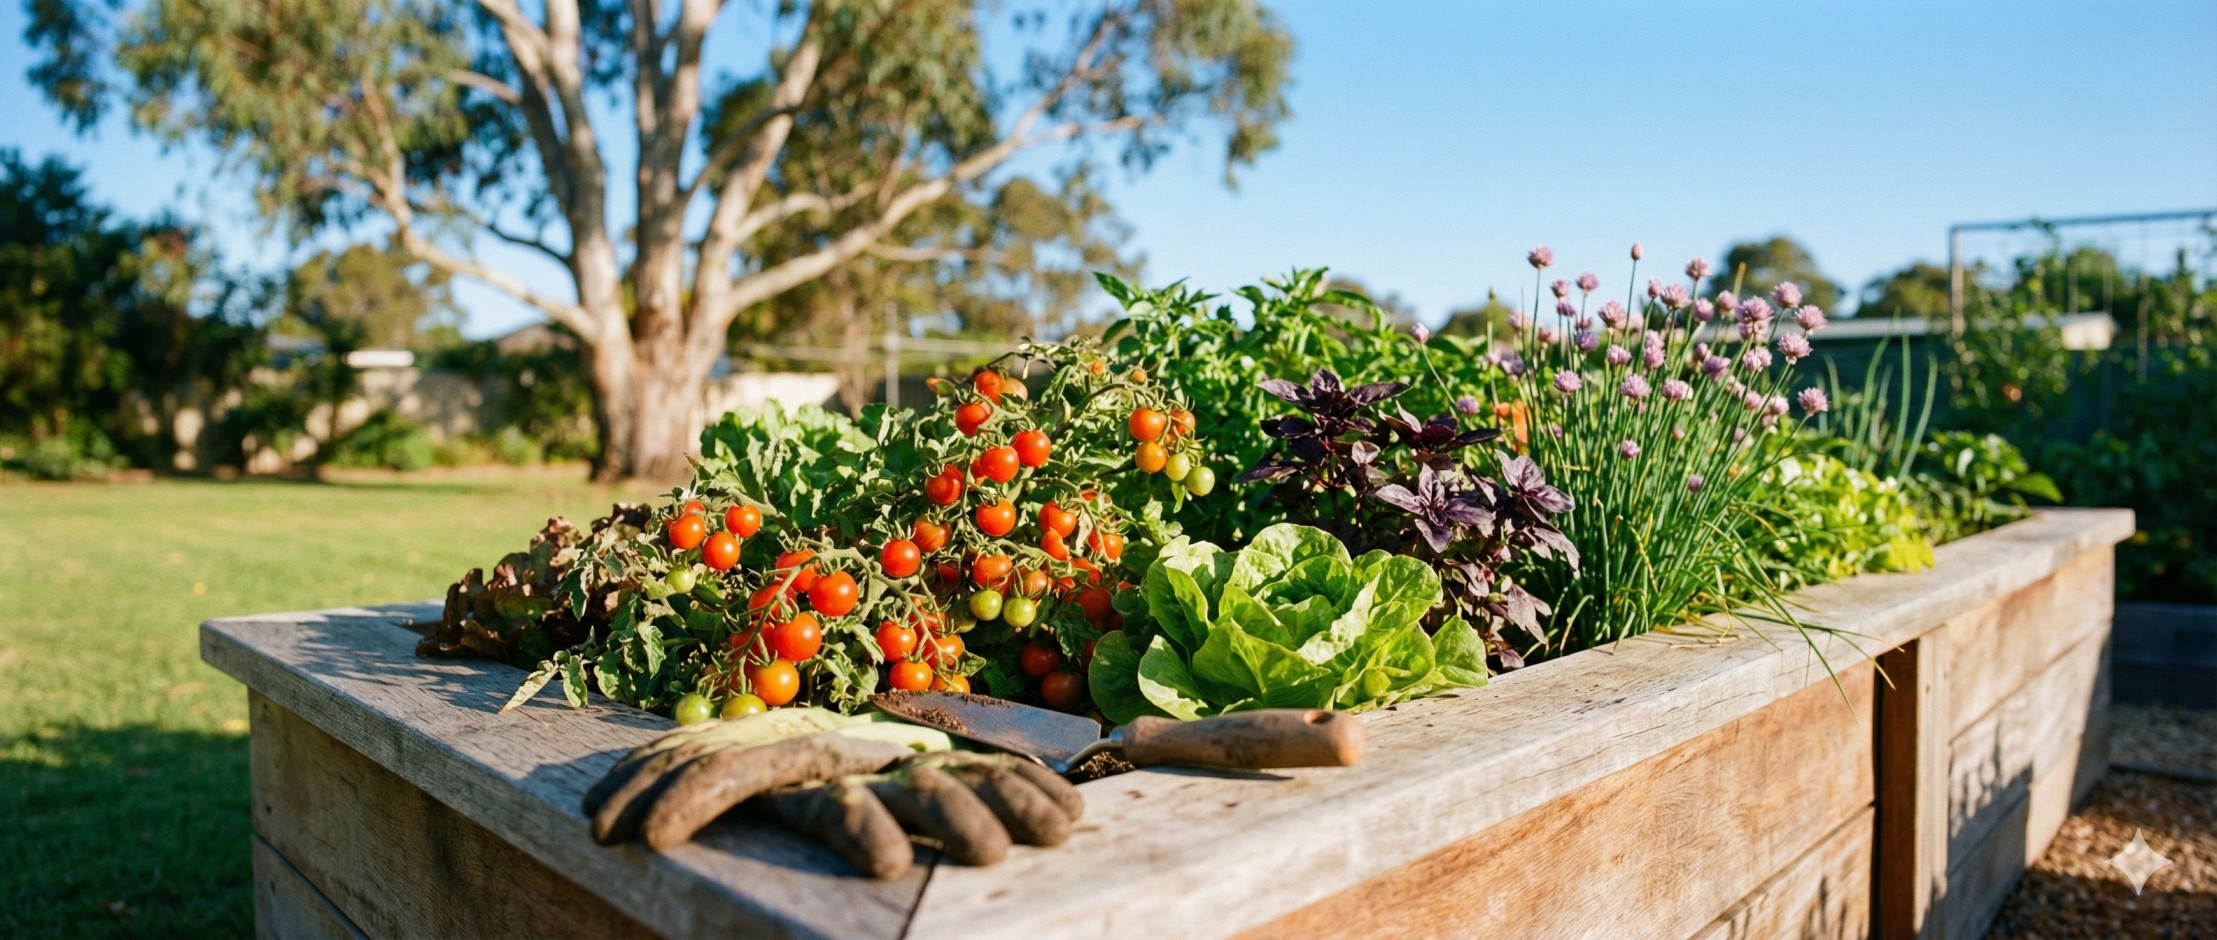
G’day, fellow Aussie gardeners! If you’re tired of battling with our famous “problem soils”, whether it’s thick clay that bakes like bricks in summer or sand that won’t hold water, I’ve got the solution you’ve been digging for. Starting a DIY raised garden bed guide Australia style is the smartest move you can make for your backyard. It’s not just a trend; it’s a total game-changer for growing lush veggies, herbs, and flowers in our unique climate.
I remember my first attempt at a backyard veggie patch in our Brisbane rental. I dug and I sweated, only to watch my seedlings drown in a concrete-like clay pan after the first storm. It was heartbreaking! That’s when I built my first rough, wonky raised bed from old fence palings. The difference wasn’t just noticeable; it was miraculous. The plants actually wanted to grow. That’s the magic I want for you.
This guide is my down-to-earth, practical handbook to help you skip the mistakes and build a thriving, productive garden. We’ll talk raised garden bed designs, the nitty-gritty of building raised beds, and the crucial debate on the best wood for raised beds in our conditions. Let’s get your hands dirty.
Table of Contents
Why a Raised Garden Bed is an Aussie Backyard’s Best Mate
Before we grab the hammer, let’s nail down the “why.” In Australia, our gardening challenges are unique. A raised bed isn’t just a pretty box; it’s a strategic tool. Think of it as creating a perfect little microclimate for your plants, right on top of whatever your yard throws at you.
- Conquer Any Soil: Building up means you can fill your bed with a perfect, custom soil mix right from the start. No more fighting with clay, sand, or the rubble often found under new Aussie lawns. You’re the boss of this dirt.
- Superior Drainage: Those heavy summer storms won’t waterlog your precious tomato roots. Raised beds drain excess water away beautifully, preventing rot, a lifesaver in humid subtropics and a game-changer in temperate winters.
- Warmer Soil, Longer Seasons: The soil in raised beds warms up faster in spring. This means you can get your seedlings in earlier and extend your growing season into autumn. In cooler Tasmanian or Victorian climates, this extra few weeks is pure gold.
- Better Access, Less Ache: At a comfortable height, they’re easier to plant, weed, and harvest. Your back will thank you. It turns gardening from a chore into a pleasure. For more projects that make backyard life easier, explore our diy backyard projects category.
- Neat and Controllable: They define your garden space, keep pathways clear, and make it harder for pests and weeds to invade. Plus, let’s be honest, they just look tidy and intentional.
The Heart of the Build: Choosing the Best Wood for Raised Beds
Alright, let’s get to the timber yard talk. This decision is where your bed’s future is decided. The material you choose dictates its lifespan, cost, and even the safety of your veggies. Here’s the real, unvarnished talk on the best wood for raised beds in Australia, straight from years of trial and error under our harsh sun.
Hardwoods (The Premium, Long-Lasting Choice):
- Spotted Gum, Jarrah, Treated Pine (H4 or H5): These are the champions for longevity. Hardwoods like Spotted Gum are naturally durable and can last 10-15+ years with a bit of care. H4-treated pine is the practical hero here. It’s specifically treated for in-ground contact and is a fantastic, cost-effective option at Bunnings or your local yard. It’s safe for edible gardens when sourced from reputable suppliers, the chemicals are locked in.
- Pro: Extremely long-lasting, handles our weather superbly, looks gorgeous as it silvers off.
- Con: More expensive upfront, heavier to work with. Hardwoods can be tough on drill bits and saw blades!
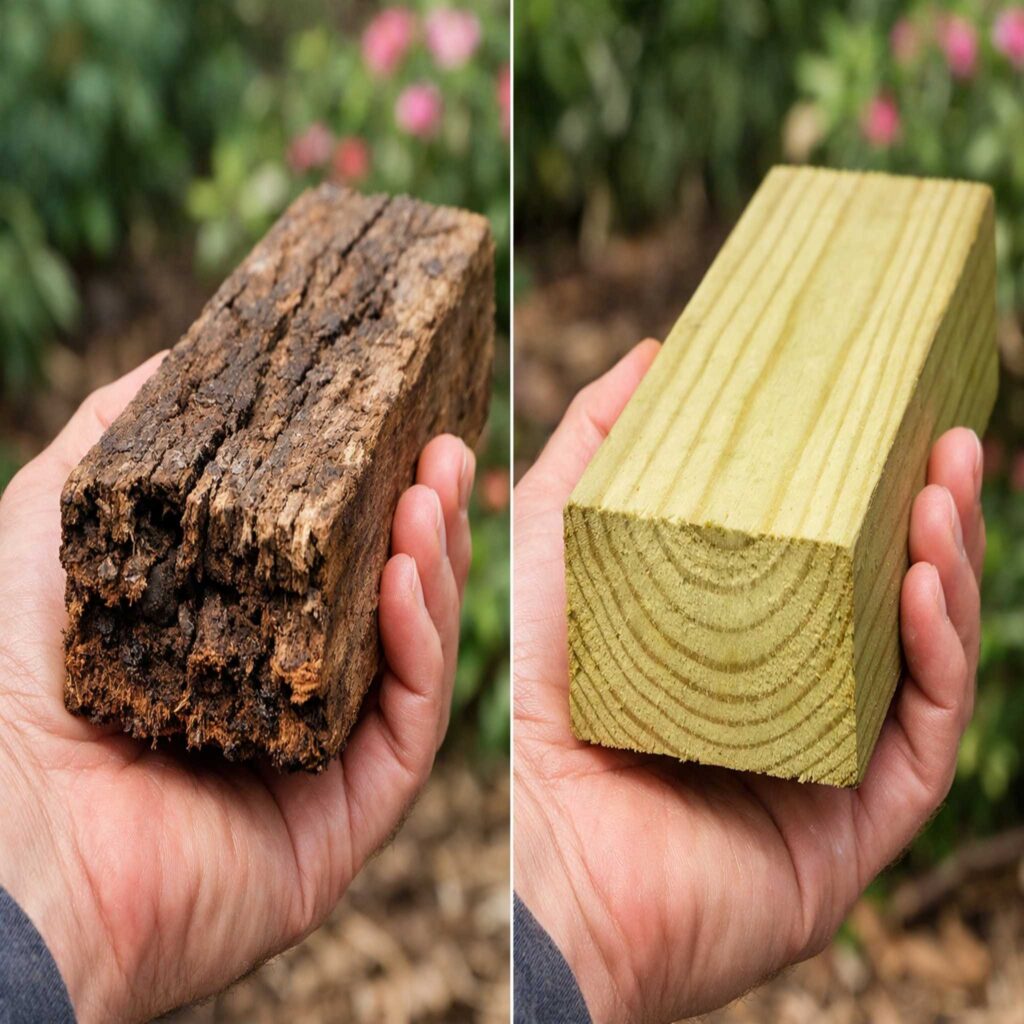
Softwoods (The Budget-Friendly Starter Option):
- Untreated Pine, Railway Sleepers (Old): Untreated pine is cheap but may only last 2-4 years before it starts to rot and warp. Here’s my strong advice: Please avoid old railway sleepers for veggie gardens. They’re often soaked in creosote or other nasty chemicals you don’t want leaching into your soil and your food. It’s not worth the risk.
- Pro: Very low cost, easy to cut and handle for a first-timer.
- Con: Short lifespan, can warp and rot quickly, leading to a disappointing collapse just as your plants take off.
Alternative Materials: Get Creative!
- Corrugated Iron: Looks modern, lasts ages, and heats soil quickly (brilliant for cooler regions like Tassie or the ACT). Ensure edges are safely folded and use sturdy timber posts for corners. In full sun, consider a light-coloured paint on the outside to reflect heat.
- Bricks/Blocks: Permanent and sturdy. Great for curved designs but requires more skill (and a level!) to install. They also retain heat beautifully.
- Recycled Plastic or Composite: A sustainable, rot-proof option, though it can be less rigid and more expensive. Perfect if you want a “build it once” solution.
My Verdict from the Shed: For the best balance of cost, longevity, and ease, H4-treated pine is hard to beat for a diy raised garden bed australia project. It’s designed for the job. If your budget stretches, go for a beautiful hardwood, you’ll never regret it.
7 Proven Raised Garden Bed Designs for Every Aussie Yard
Now for the fun part, the design! This is where your personality meets practicality. Your choice depends on space, budget, and what you want to grow. I’ve built most of these, and each has its own charm.
The Classic Timber Rectangle (The Perfect Beginner’s Project)
This is your go-to, no-fuss design. It’s the trusty ute of raised beds, reliable and does the job brilliantly. I’ve built a dozen of these.
- Ideal Size: Here’s the golden rule: Never make it wider than you can comfortably reach. For most of us, that’s no more than 1.2 metres. This lets you plant, weed, and harvest from either side without ever stepping on the soil (compacting soil is a no-no!). Length is up to you, but 2.4m makes good use of standard timber lengths. Depth is key: 30-45cm is perfect for 95% of veggies, giving roots room to roam.
- Build Tip: Use 90mm x 90mm H4 treated pine posts for the corners, sunk into the ground for stability. Screw your side planks (e.g., 200mm x 25mm H4 treated pine) into these posts. Pre-drill your holes to avoid splitting the timber!
The “No-Dig” Lasagne Layer Bed (Instant Garden, Zero Tools)
Not keen on building a frame or have zero tools? This raised garden bed design is your secret weapon. It’s building soil health from the ground up, literally. I used this method to turn a weedy patch of lawn into a pumpkin paradise in one season.
- Mow the area super short.
- Lay down a thick layer of cardboard or newspaper (soak it with the hose) to smother the grass and weeds. Worms love this stuff.
- Now, layer like you’re making a giant lasagne for the earth: a 10cm layer of straw (brown), then 5cm of well-rotted manure or green lawn clippings (green), another layer of leaves (brown), some food scraps (green). Keep it going!
- Top with a final 15cm of the best compost and soil mix you can get.
It’s a fantastic, lazy way to start and is deeply connected to making your own nutrients. Pair it with a diy compost bin australia project for a truly closed-loop system where nothing is wasted!
The Corrugated Iron & Timber Combo (The Bush-Chic Look)
This design adds a brilliant, rustic-industrial look to your garden and is fantastic for heat-loving plants like tomatoes, capsicums, and eggplants. The iron acts like a thermal mass, keeping roots cosy on cool nights.
- How-To: Use hardwood or H4 pine posts for the corners and ends. Screw sheets of corrugated iron (often called “corro”) to the inside of the timber frame. This hides the timber edges and looks slick. Crucial: Ensure the top edge is safely rolled over a batten or capped with a timber rail, those edges can be razor sharp.
- Aussie Tip: In scorching, full-sun areas (I’m looking at you, Western Australia), consider painting the outside of the iron a light, reflective colour to prevent the soil from becoming a slow-cooker for your plant roots.
The Tiered or Staircase Bed (Master the Slope)
Got a sloping backyard that’s a pain to mow? Don’t fight it, use it! Tiered beds create a stunning visual effect, like a green amphitheatre, and maximise space on a slope. They’re a cornerstone of sustainable backyard ideas australia for good reason.
- Design: Build a series of rectangular beds, each stepping down the slope. Use the retaining wall of the upper bed as the back of the lower bed. The key is to ensure each individual bed is perfectly level, even if the slope is steep.
- Drainage is Key: Make sure water can drain freely from the upper beds without washing away the soil of the lower ones. Good planning turns a problem into your garden’s best feature.
The Wicking Bed (The Water-Saving Wonder for a Thirsty Country)
In our drought-prone land, this design is pure genius. It’s a self-watering raised bed where plants draw moisture up from a reservoir below through capillary action. I built one for my brother in Broken Hill, and he now waters every 10-14 days in summer, not daily.
- Core Components: A heavy-duty pond liner or specific wicking bed liner, a 15-20cm deep layer of scoria or gravel for the reservoir, an ag-pipe or PVC slotted pipe to fill it, a soil barrier (geotextile fabric to keep soil out of the reservoir), and your soil mix on top.
- Perfect For: Balconies, water-wise gardens, busy families, and anyone who wants to slash their water use. The Australian government’s water-saving advice strongly supports such innovations. It’s the ultimate in smart, eco friendly backyard projects.
The Keyhole Garden Bed (Permaculture Power)
Inspired by African permaculture, this circular bed has a central compost basket and a keyhole-shaped indentation for access. You feed the centre with kitchen scraps and greywater (from your rinsing water), and nutrients leach out to feed the surrounding plants. It’s a beautiful, efficient, and fascinating system to watch work.
The Simple Pallet Collar Bed (The Renter’s Best Friend)
Need something cheap, quick, and non-permanent? Those square, clean wooden collars that transport bricks or pavers are often given away free on Facebook Marketplace or outside building sites. Line them with weed mat, fill with potting mix, and you have an instant, shallow bed perfect for lettuce, spinach, herbs, and strawberries. Stack two for deeper roots. They’re mobile, so you can take your garden with you!
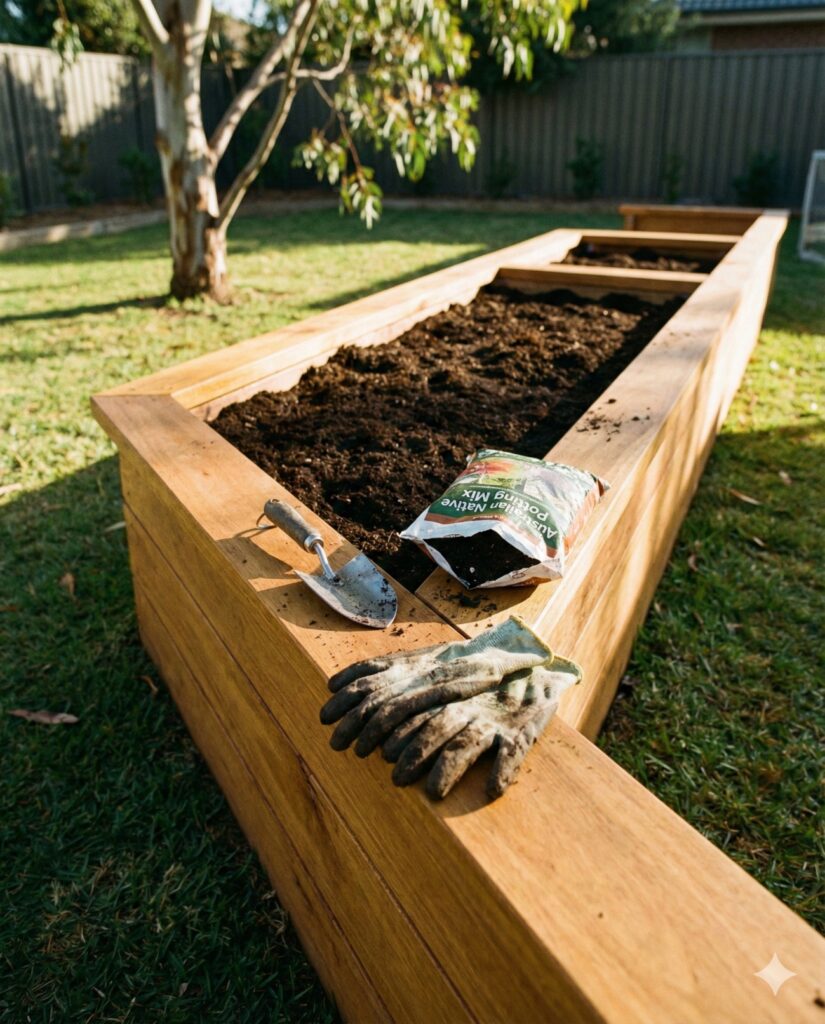
Building Raised Beds: Your Step-by-Step Guide to the Classic Design
Let’s walk through building a classic 1.2m x 2.4m x 40cm timber bed. I’ll talk you through it like you’re helping me in my shed.
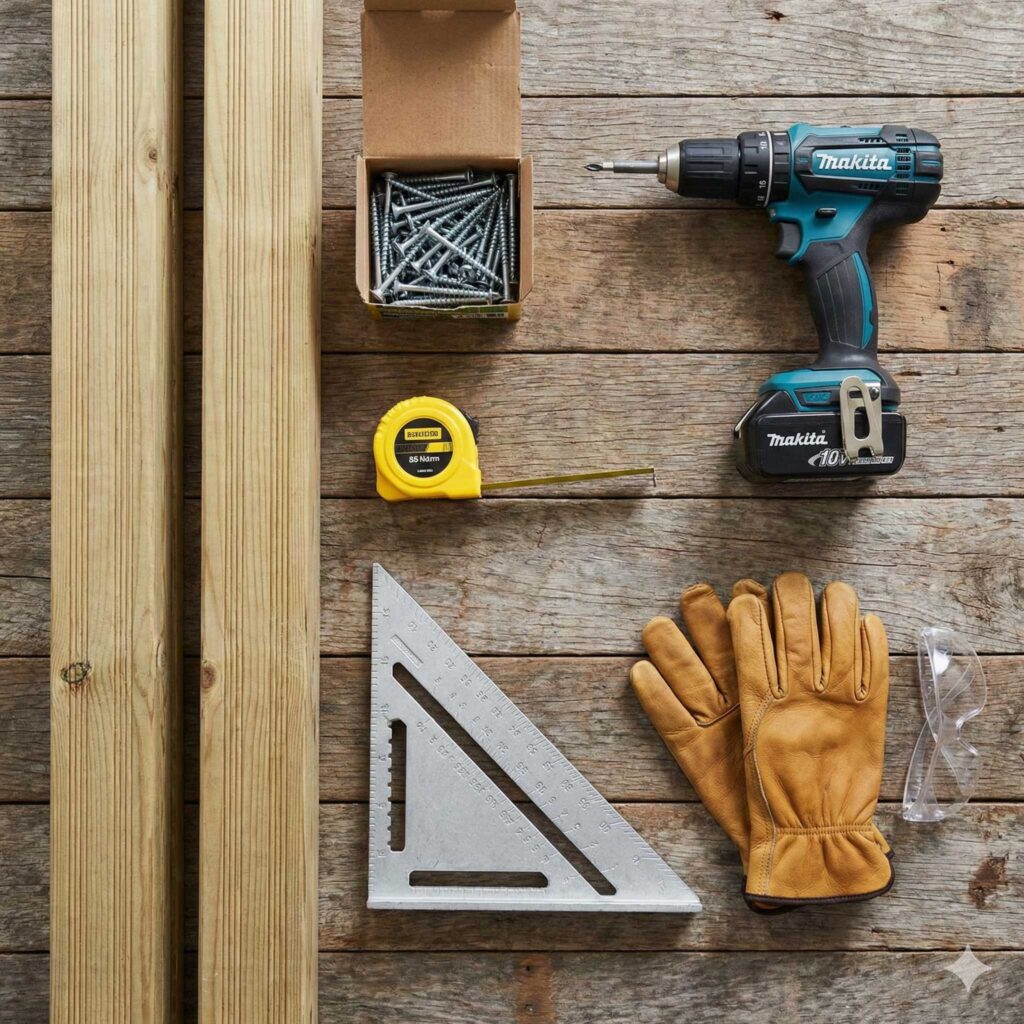
Tools & Materials You’ll Need:
- Timber: H4 Treated Pine. (4) 40cm lengths of 90x90mm for corner posts. (4) 2.4m lengths & (4) 1.2m lengths of 200x25mm for sides.
- Tools: Spade, spirit level, cordless drill, circular saw or hand saw, shovel, wheelbarrow, tape measure, pencil.
- Fasteners: 100mm galvanised bugle head batten screws (these are strong, won’t rust, and sink in neatly). Don’t use nails – they’ll work loose.
- Soil & Extras: Quality soil mix (recipe below). Optional: weed mat for the base if battling demon weeds like couch grass or kikuyu.
The Build Process: A Saturday Well Spent
- Site & Prep: Choose a flat, sunny spot (6+ hours of sun is the veggie sweet spot). Mark out your rectangle with string lines or a hose. Dig shallow holes (about 15-20cm deep) for your four corner posts.
- Install Corner Posts: Place the 90x90mm posts in the holes. This is where you need patience. Use your spirit level to ensure each post is plumb (perfectly vertical) in both directions. Have a mate hold it while you backfill with soil and tamp down firmly with a post or your boot heel.
- Attach the Long Sides: Fix your first 2.4m side plank to the inside of the corner posts, starting from the bottom. Use two screws per plank, per post. Drill a small pilot hole first to make life easier. Use your level on top of the plank as you go. Attach the second long side plank opposite.
- Attach the Short Sides: Now fit the 1.2m end planks. For a neat finish, butt them up between the two long sides you just attached. It creates a clean corner. Screw them into the corner posts.
- Build Up: Repeat steps 3 & 4, adding your next layer of planks. Stagger the vertical joins for strength.
- Final Check: Measure diagonally from corner to corner. If the two diagonal measurements are equal, your bed is perfectly square. Give the whole structure a shake – it should feel solid.
- Prepare the Base: Fork over the ground inside the bed to break up compaction. This helps with drainage and lets worms move up. Lay down weed mat if needed, cutting slits for drainage.
- The Big Fill – Don’t Skimp Here! This is the most important step. Your plants live here. My go-to mix: In the wheelbarrow, combine 60% premium garden soil or sandy loam, 30% well-rotted compost (from your own diy compost bin australia – it’s free!), and 10% coarse river sand or coconut coir for drainage. For every two barrows, throw in a handful of pelletised chook manure and a cup of worm castings if you have them. Fill to within 3-5cm of the top.
- Water In: Give the soil a deep, gentle soak with a watering can or hose on a soft spray. This settles everything. It will sink – top it up with more mix the next day.
Common Mistakes to Avoid (I’ve Made Most of These So You Don’t Have To!)
Let’s be real. We all stuff up. Here’s the hall of fame for raised bed blunders, learned the hard way.
- Using Unsafe Materials: Old railway sleepers, painted/treated fence palings, or mystery timber. When in doubt, leave it out. Your veggie patch isn’t the place for chemical unknowns.
- Going Too Wide: That moment you have to belly-flop onto the soil to reach a weed is the moment you regret your 2m wide dream bed. Stick to 1.2m.
- The “Dirt Cheap” Soil Trap: Filling your beautiful bed with cheap, bagged “garden soil” that’s mostly mulch and sand is like building a mansion on a rubbish tip. Invest in a good mix. It’s the foundation.
- Insufficient Depth: A shallow 15cm bed is okay for herbs, but carrots, parsnips, and tomatoes will hit the hard pan below and stunt. Go deep (30cm+) for versatility.
- Forgetting the Sun: I once built a glorious bed in the only spare spot, which got 2 hours of sun. My tomatoes were the saddest ever. Watch the sun for a full day before you build.
- Ignoring the Ecosystem: A bare bed is a lonely bed. Plant flowers to bring in bees and pest-eating insects. It’s all part of a holistic, backyard sustainability ideas australia approach. Think about adding a small insect hotel nearby!
Australian Climate & Soil Considerations: Your Local Guide
Our DIY raised garden bed guide Australia needs local knowledge. What works in Cairns will flop in Hobart.
- Hot & Dry (Perth, Adelaide, Inland NSW): Use thick timber (like 32mm planks) to insulate soil from heat. Mulch HEAVILY with 10cm of straw or lucerne. In peak summer, a 30% shade cloth suspended over the bed can prevent bolting and scorching. Wicking beds are an absolute superstar here. Water in the early morning.
- Subtropical (Brisbane, Northern NSW, Darwin): Prioritise drainage above all else! Use a grittier soil mix with more sand or perlite. Elevate beds on bricks or legs if you can, to improve airflow underneath. Be militant about airflow around plants and water the soil, not the leaves, to deter fungal diseases.
- Temperate (Melbourne, Sydney, Canberra, Hobart): Raised beds are perfect here. They help overcome cold, wet soils in spring. Use dark-coloured materials (painted iron, dark timber) to absorb the sun’s warmth. In frosty areas, have some frost cloth on standby. The University of Melbourne’s Burnley College has excellent, specific resources for temperate zone gardening.
- Your Universal Soil Mix Recipe: For a bulletproof start, mix in a giant tub or on a tarp: 5 parts compost, 3 parts coconut coir (for water retention), 2 parts coarse sand or perlite (for drainage), 1 part worm castings (for life). Mix well. It’s light, fluffy, and plants go nuts for it.
Integrating Your Raised Bed into a Living, Breathing Backyard
Your raised bed shouldn’t be a lonely island of veggies. It’s the heart of a living system. This is where gardening becomes truly rewarding.
- Companion Planting is Magic: Plant French marigolds to deter nematodes. Let basil snuggle up to your tomatoes. Grow dill and coriander to attract parasitic wasps that eat caterpillars. It’s a beautiful, chemical-free puzzle.
- Make Your Own Fertility: Start a diy compost bin australia. All your weed scraps, lawn clippings, and kitchen waste become black gold to feed your beds for free. It’s the circle of garden life!
- Think Bigger Ecosystem: Once you’ve mastered the bed, why not consider the ultimate garden helpers? Chickens provide eggs, pest control, and magnificent manure for your compost. We have a great diy chicken coop backyard australia plan to get you started.
- Create a Closed-Loop System: Look at sustainable backyard ideas australia like connecting a rainwater tank to your beds, using swales to direct rainwater, or planting a native bee-attracting hedge nearby. Our post on eco friendly backyard projects ties all these ideas together into a cohesive plan.
Frequently Asked Questions (FAQs) From My Backyard Gate
Q: Seriously, how much will this set me back?
A: For a classic 1.2m x 2.4m H4 pine bed, budget $150-$250 for timber and screws. The soil is the variable – good stuff can cost another $100-$200 to fill it. It feels like an outlay, but divided over the 5-10+ years of harvests you’ll get, it’s pennies per meal.
Q: I’m on a second-floor balcony/apartment. Can I do this?
A: Absolutely! Use lighter materials like cedar or composite timber. Ensure your bed has a waterproof liner and sits on pot feet for drainage. Use a premium potting mix (not soil) to keep weight down and ensure good results. Check your balcony’s weight limit first!
Q: I’m a total newbie. What should I plant FIRST?
A: Start with the easy wins to boost your confidence: Lettuce (pick leaves as you need them), radishes (ready in 6 weeks!), silverbeet (it’s indestructible), cherry tomatoes (like ‘Sweet Bite’), and bush beans. Herbs like basil, parsley, mint (in a pot!), and thyme are foolproof.
Q: How often do I REALLY need to water?
A: The finger test never lies. Stick your index finger into the soil up to the second knuckle. If it feels dry, water deeply until it runs out the bottom. In mid-summer, this might be daily. In spring, maybe twice a week. Mulch will dramatically reduce how often you need to do this.
Conclusion: Your Patch, Raised & Ready
There you have it, your comprehensive, from-the-ground-up DIY raised garden bed guide Australia, packed with everything I’ve learned from years of happy mistakes and glorious successes. Building your first raised bed is more than a weekend project; it’s the first step towards fresher meals, a more beautiful and productive outdoor space, and a deeper, more satisfying connection to what you eat and how you live.
It’s a core skill for any eco friendly backyard projects enthusiast. Start simple, learn as you go, and don’t be afraid to get it wrong. Every gardener has a few failures, they’re just compost for future success. The main thing is to start.
So, grab that tape measure, head to the timber yard, and get building. Imagine the scent of basil in the summer air, the crunch of a homegrown carrot, and the pride of saying, “I grew that.” Your future self, biting into a sun-warmed tomato from your own hand-built bed, will be so grateful you began.
Happy gardening, Australia. Now, let’s get growing.
3 thoughts on “The Best DIY Raised Garden Bed Guide Australia: 7 Proven Designs”